Wednesday, December 7, 2016

Paneer Tikka Masala | Side dish for roti

Paneer tikka masala, is a popular paneer recipe, which i saw for the first time in Sanjeev kapoor's recipe book long back. I tried my own version few months back, when i have my friend's family for dinner, the paneer tikka masala was a super hit with kulcha. I have a small pack of paneer left in the freezer and wanted to finish off before i go for my vacation. So made this paneer curry few days back and everyone at home loved it. I have already posted paneer tikka dry recipe and hariyalai paneer tikka recipe, stove top version. The tandoori barbeque flavour can be easily be infused in the paneer masala using the charcoal method which i have used in Dabba style dal. Try this recipe and let me know how it turned out.
paneer tikka masala

 Check out my other popular paneer based gravies


Paneer tikka masala recipe

  Preparation Time : 15 mins + 30 mins marination | Cooking Time : 40 Mins |Serves: 5-6

     For marination
Paneer cubes   2 cups
Red chili powder  1 tsp
Coriander powder |dhaniya  1/2 tsp
Cumin powder | jeera 1/2 tsp
Tandoori masala  3/4 tsp
Thick yogurt   2 tblsp
Salt  as needed
Kasoori methi  2 pinches
 
   For the gravy
Onion   4
Garlic  5 pods
Cashew  10
Oil   1 tblsp
Tomato puree 1/2 cup
Red chili powder  1 tsp
Coriander powder  1/2 tsp
Cumin powder   1/2 tsp
Garam masala   1 tsp
Salt  as needed
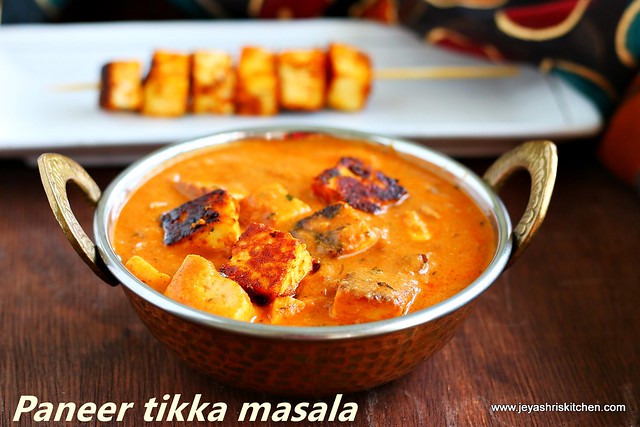


Paneer tikka masala
Method:
  • Bring the paneer to room temperature.
  • In a wide bowl add the paneer, hung curd, kasoori methi, red chili powder, tandoori masala (or garam masala), salt, cumin powder and coriander powder.
  • Mix this well and ensure the masalas are evenly coated. 
  • Marinate this paneer for 30 minutes. You can marinate for 2-3 hours too. 
  • While marinating keep this inside the refrigerator. 
Lets make the gravy for the paneer tikka masala, while the paneer is getting marinated.
  • Chop 2 onions finely. Take out the skin of the garlic. 
  • In a pan add 1 tblsp of oil and add in the onions, garlic and cashew nuts. 
  • Cook in a medium flame till the onions gets nicely browned. Be careful not to burn this. 
  • Allow this to cool completely and grind this into a smooth paste. 
  • Keep this aside.
  • In a pan add 2 tsp of oil and add in the chopped onions (2 onions)
  • Cook till they turn translucent. 
  • Add in the ground paste to this. Add in the tomato puree to this.
  • Add the red chili powder, jeera powder, coriander powder, garam masala powder, salt and mix well.
  • Add 1/2 cup - 3/4 cup of water to adjust the consistency. Since we have added cashew nuts and also the addition of paneer in the last will make the gravy thicken. So add water accordingly.
  • Boil this for few minutes in a low flame and stir this in between.
  • Switch off the flame. Or you can either do the paneer tikka side by side.
  • Grease a tawa and cook the marinated paneer. Alternatively you can do it in the oven. But i have no experience on cooking paneer tikka in oven.
  • Cook this on a medium flame on all sides till you get them nicely browned.
  • Add the cooked paneer tikka to the masala and add the kasoori methi to the gravy.
  • Bring this to a boil. Check for the consistency.
 
  • Add the fresh cream or milk (room temperature) to the gravy and mix well.
  • If you have charcoal, you can go ahead by heating the charcoal on open flame and keep it in a small bowl and put a tsp of butter on it and immediately close the pan with a lid.
  • Keep the flame very small and cook for 5 minutes. Switch off.
  • If you do not have charcoal, just switch off the flame after adding the milk or cream. 
  • If using charcoal, i highly recommend to use it , just before serving the gravy. In this way it retains the smoky flavour and gives nice taste of dabha style paneer tikka masala.
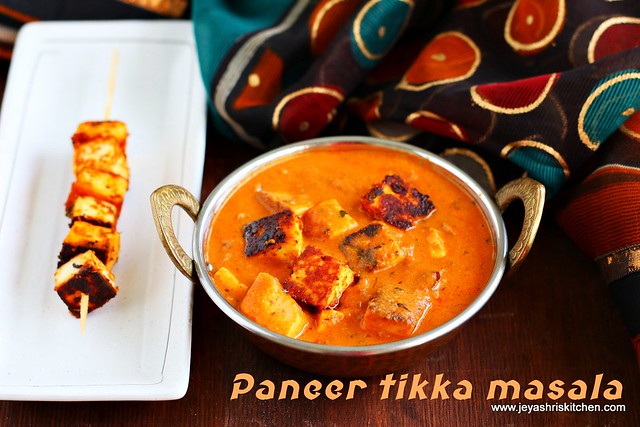
paneer tikka masala
Notes:
  1. You can buy big block of paneer and cut them into cubes and do the paneer tikka masala.
  2. I used the ready made paneer cubes. 
  3. Adding tandoori masala gives a nice bbq tandoori flavour to the paneer. If not available add the garam masala. 
  4. You can add pan fried capsicum and onions also or you can marinate them along with the paneer and cook them on tawa.





Monday, December 5, 2016

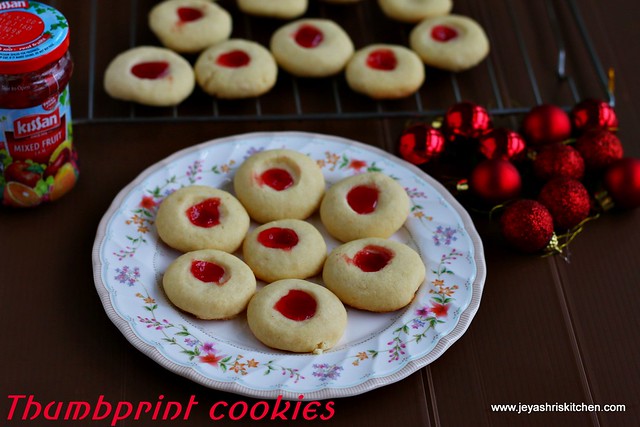
Thumbprint cookies recipes | Eggless cookies recipes

Thumbprint cookies, if i remember well, this is the first one i baked when i got my new oven 7 years back. The simple easy cookie me and my daughter baked again for the last working day of this year, before their school holidays. I used my puppy faced cookies for the base and made these thumbprint cookies. The eggless cookies turned out so beautiful and everyone in the class loved it very much. As the Christmas season is nearing, you can bake this easy eggless thumbprint cookies at home and enjoy the holidays. We are off for vacation to Chennai in a few days, so i will be scheduling few simple posts during my vacation. Check out my


Thumbprint cookies

  Preparation Time : 20 mins | Baking Time : 10-12 Mins |Makes: 18-20 cookies

     All purpose flour | plain flour | maida   1 cup
     Butter    1/2 cup
     Vanilla essence   1/4 tsp
     Sugar  1/4 cup
     Jam   1- 2 tbslp approx 


Thumbprint cookies
Method:
  • Soften the butter and powder the sugar. Add both together in a bowl and mix this nicely.
  • Add vanilla essence to this. 
  • Add the flour to this now and knead this into a pliable dough. If you feel that the dough is bit dry add 1-2 tblsp of milk to this and knead well without any cracks.
  • Make them into small lemon sized balls and slightly flatten it. 
  • Microwave the jam for 45 seconds and keep it ready. 
  • If you do not have a microwave you can keep the jam in a bowl of hot water.  
  • I used kissan fruit jam. You can any jam of your choice.
  • Make a dent in the center using your thumb and fill the dent with jam. Do not add too much jam, else it will over flow and spoil the appearance of the cookie when it is baked.
  • Alternatively you can use a cookie press to make shapes. 
  • Bake the cookies in an oven for 10- 12 minutes at 160 degree Celsius. 
  • Allow this to completely cool. The cookies won't change colour. 
  • Thumb print cookies are ready . Cool this completely in a wire rack and store the jam cookies in an airtight container.
Eggless cookies
Notes:
  1. If you feel the cookies bit soft when you take out from the oven, just allow that to cool completely and see, if it is still soft then bake for 2-3 minutes more.
  2. Do not add more jam to the dent, else it will overflow and splash all over the cookies while baking and spoil the look of the cookies.
  3. You can follow my eggless custard powder cookies recipe also to make this thumbprint cookies.
  4. Instead of jam you can add nutella too. 


Friday, December 2, 2016

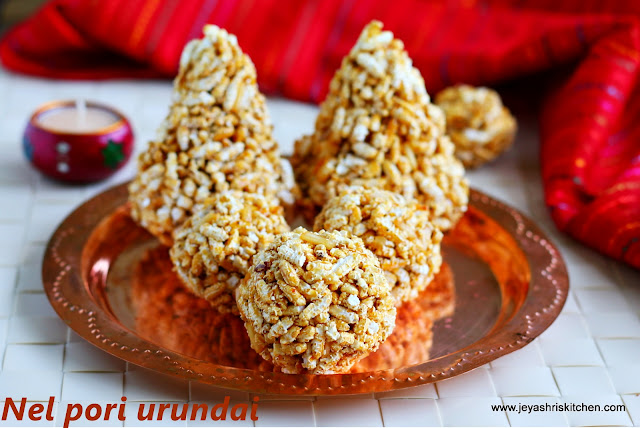
Nel pori urundai recipe | Karthigai pori urundai recipe with video

Nel pori urundai recipe with video

Nel pori urundai is the traditional recipe we make for Karthigai deepam. Karthigai deepam is celebrated in Tamilnadu and we lit lamps in the houses. Karthigai deepam 2016 is on Dec 12. We make pori urundai and in the traditional brahmin houses,we make paruppu thengai first and then proceed with making of balls. Some houses they do not make urundais, they just mix the pori with jaggery syrup and offer as neivedhyam. Recently in my skype class i took the session on making of pori urundai using nel pori and paruppu thengai too. I have already posted pori urundai recipe but that was made with the puffed rice, which we use for bhel puri. We also make aval pori urundai for karthigai deepam. For all types of pori, we use the same proportion and method, as mentioned in the recipe below. Check out my other karthigai deepam recipes.  
nel pori urundai


Wednesday, November 30, 2016

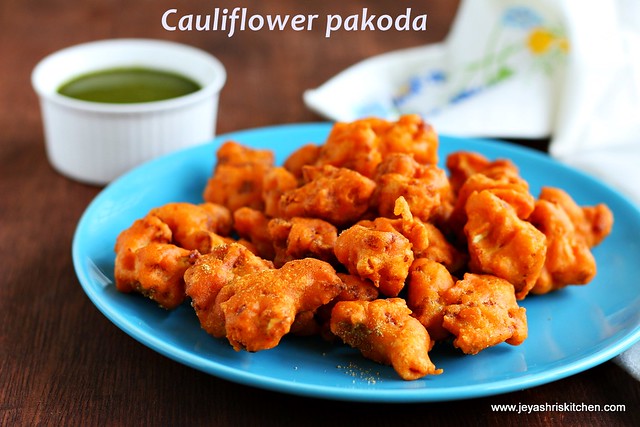
Cauliflower pakoda recipe | Cauliflower pakora

Cauliflower pakoda recipe with video
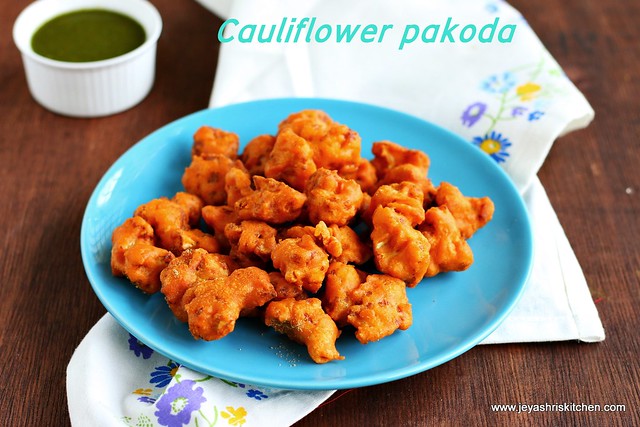
Cauliflower pakoda | Gobi pakora is a easy and tasty tea time snack made with cauliflower. I have already posted gobi 65, veg pakora recipe, but this one is more of South Indian style cauliflower pakoda. I just sprinkled little chaat masala in the last to enhance the flavour. You can serve this as a tea time snack or serve as an accompaniment for a southIindian meal. We used to have this cauliflower pakoda with curd rice too. Try out this crunchy cauliflower pakora and let me know how it turned out.
Cauliflower - pakoda

Cauliflower pakoda recipe

  Preparation Time : 15 mins | Cooking Time : 35 Mins |Serves: 3

     Cauliflower florets   2 cups
     Besan | Kadalai maavu  1/2 cup
     Rice flour   1/4 cup
     Red chili powder   1 tsp
     Salt   as needed
     Baking soda   a pinch
     Oil   for deep frying
     Chaat masala   2-3 pinches (optional)
                                         Video of how to make cauliflower pakoda


Cauliflower pakoda
Method:
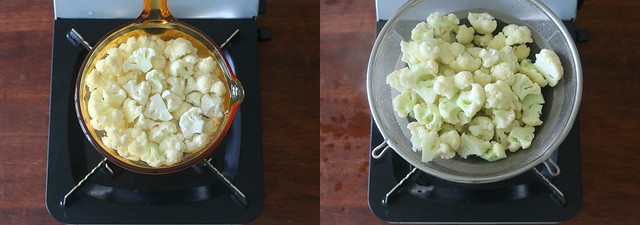
  • Wash the cauliflower florets and keep it aside. 
  • In a pan add water and add little salt. Bring it to a boil. 
  • Add the cauliflower florets to this and let this stay in hot water for a minute.
  • Drain the water completely and keep it aside. 
cauliflower pakoda
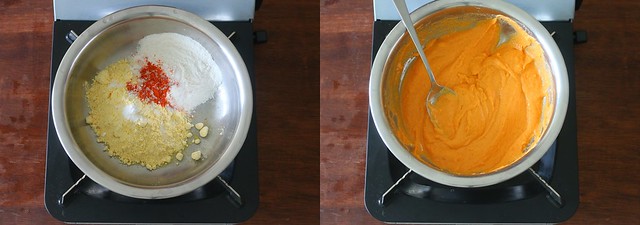
  • In a bowl add the besan, rice flour, red chili powder, baking soda and salt. 
  • Add little water and make a thick paste out of this without any lumps. 
  • The consistency should be little thicker than an idli batter. Beat the mixture with a spoon nicely to get a nice airy batter. 
cauliflower pakoda 2
  • If you add more water by mistake add 1-2 tblsp of rice flour to bring it to the right consistency.
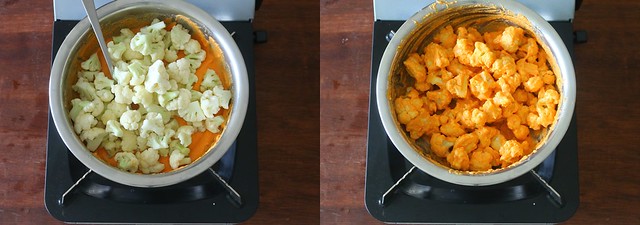
  • Add the cauliflower florets to this and mix well and let all the florets get coated with the batter evenly.
cauliflower pakoda 3 
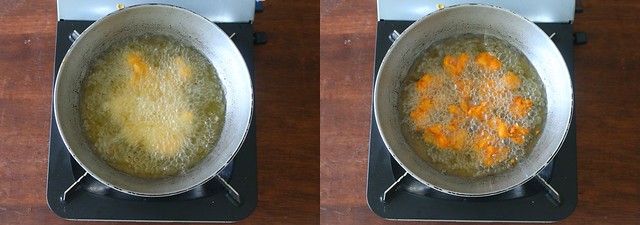
  • Heat the oil for deep frying. When it is hot, bring the oil to medium flame and put the cauliflower florets in oil and fry in batches.
  • Let this cook and gets golden brown on the outer side. 
cauliflower pakoda 4
  • Once it is done take out from oil drain in kitchen towel. 
  • When it is hot sprinkle some chaat masala on this and serve hot. Adding chaat masala is optional, you can skip this too.
cauliflower pakoda
Notes:
  1. You can add ginger garlic paste to the batter.
  2. Ajwain | omam can also be added to the batter. 
  3. Ensure that the batter should not be too thin, else the batter will not get even coating and also will absorb oil.
  4. Keep the cauliflower florets ready and mix the batter just before frying. 
  5. I made the mixture on one shot and kept one batch without frying inside the refrigerator and fried after 3 hours. It turned out pretty well. 
  6. Do not fry in low flame. It will make the pakoras soggy. 
  7. Finely chopped coriander leaves can be added to the batter to give a nice flavour. 
  8. Enjoy the cauliflower pakoras | cauliflower pakodas with ginger tea or filter coffee.

Monday, November 28, 2016

Undhiyu recipe | Gujarati Undhiyu

Undhiyu is a popular gujarati recipe made with veggies which are specially available during winter. In Tamilnadu we make 7 kari kootu and thalagam during winter season with speically available winter vegetables like mochai. A similar type of  mixed vegetable is made with seasonal veggies in Gujarati cusine too. Suruti papdi is one of the main vegetable in this undhiyu and it is similar to the mochai but smaller in size. The use the whole one as such in the Undhiyu. The main spice which gives flavour to the curry is the blend of ajwain(omam), coriander leaves, green chili and coconut. Also we can say the spice mixture is similar to the aviyal with the domination of coconut in it.
Though i have heard the name of this dish, never know how it is made. They make methi muthias and deep fry this or steam it and add to the Undhiyu.
Undhiyu

 Last week a friend of mine messaged me that her hubby is going to mumbai and will get all the winter vegetable from there to make this Undhiyu recipe. She asked me whether i am interested to post the recipe in my jeyashri's kitchen. I readily accepted and she also taught me how to make undhiyu too. This is the recipe she learnt from her mil, so if you have any idea of more authentic version please leave it in the comments section.  As in my opinion, even if you do not have few ingredients, just try it out with the country veggies available in the market and enjoy this delicacy. Thsi is a semi dry masala,  generally served with pooris, we had with plain rice and papad. Just use a handful of all veggies, it will give a good volume.

Wednesday, November 23, 2016

Spicy Tawa idli recipe | Masala idli

Recipe of how to make spicy tawa idli with video
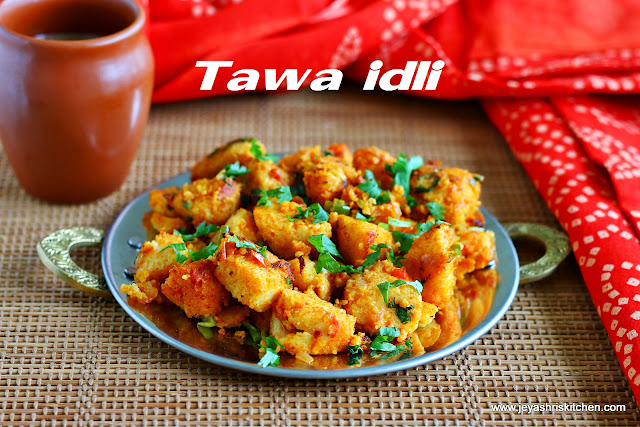
Tawa Idli is a popular street food made with left over Idlis, which serves as a delicious snack |tiffin. Generally we make idli upma or podi idli recipe using left over idli. This recipe of spicy tawa idli i saw in Tarla dalal's space and bookmarked it too. Yesterday i had a whole lot of 7 idlis which was left and made this tawa idlis. It turned out pretty well and got ready in 10 minutes. Kids loved the idlis and it tasted similar to the tawa pulao. If you are looking for some more recipes using left over idlis, try out the
spicy tawa idli

Monday, November 21, 2016

Coriander pulao recipe | Coriander Pulav

Coriander pulao with video
Coriander pulao | Pulav is an easy  pulao recipe, serves as a Lunch box recipe and quick dinner recipe too. The fresh coriander leaves and coconut with other spices makes the pulao so aromatic. I have already posted coriander rice recipe. This recipe was passed on to me from my cousin, who sent me a you tube link for this recipe reference. I found the recipe simple and nice and tried it at home last week. The pulao was huge hit at home. So tried it again today, to make a post on how to make coriander pulao. I enjoyed the pulav with onion raita for my lunch today. Try out this easy pulao recipe and let me know how it turned out.
coriander pulao

Friday, November 18, 2016

Sprouts Tikki recipe | Moong sprouts tikki

Sprouts tikki

    Sprouts tikki|Moong sprout patties is a healthy tikki recipe, made using sprouts. I have already posted a moong oats tikki recipe. As posted in my Instagram, i went as a judge for a healthy breakfast Masterchef contest, conducted by a nutritionist here in Singapore. It was a my first experience of judging a competition . A truly wonderful opportunity also to learn new things from many people, who participated in the competition. It was agreed by me to post the winner's recipe in jeyashri's kitchen, i tried the recipe made by Swati verma, the winner of the competition. She did a breakie platter, with these sprouts tikki, avocado dip , a healthy berry muffins and a fantastic kale banana smoothie. Will try to share other recipes later.
   This tikki can be made with the ingredients easily available at home. She used oats in this recipe. I realised that i was running out of oats when i started making the tikki I used the porivilaga urundai maavu which i had left . Alternatively you can use sathu maavu or besan too. Scroll down to the end of the post to get the serving ideas.
   Before publishing this post, came to know that today is Swati's birthday. Through this post, on all your behalf, wish Swati a very Happy birthday. Wish you many more success to come.

Wednesday, November 16, 2016

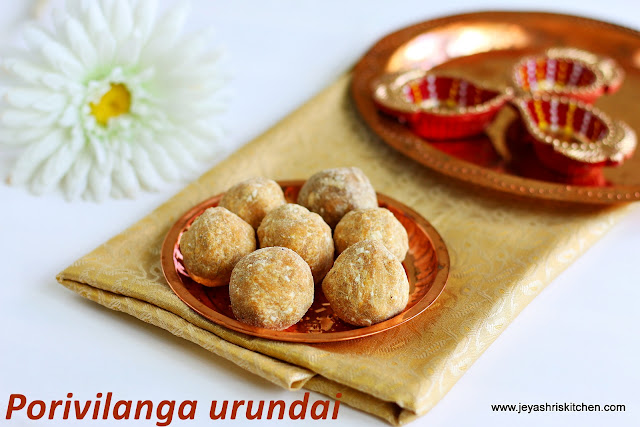
Porivilangai urundai recipe | Porul vilanga urundai | Healthy ladoo


Porivilangai urundai | Porulvilanga urundai (recipe with video) is a healthy multigrain ladoo recipe made with jaggery for sweetness, and generally we don't use ghee for this recipe. This urundai is generally hard and we break with hammer or keep it inside our mouth for a while and it gets softened. I think most of the South Indians have a good memory associated to this porulvilangaai urundai. I have noticed this recipe in amma's hand written cookery notebook. She always keep a note of all recipes she learn through our relatives and tv shows. Whenever i go to there i will have a glimpse of those recipes, but i never find time to note the recipes down. This particular porulvilanga urundai recipe is taught by my athai and she had noted down the recipe too. When i wanted to try this, i called her up and asked her for the measurements. The urundais turned out perfect. If you don't have flour mill nearby, you can try with kanji maavu | sathu maavu too.

Monday, November 14, 2016

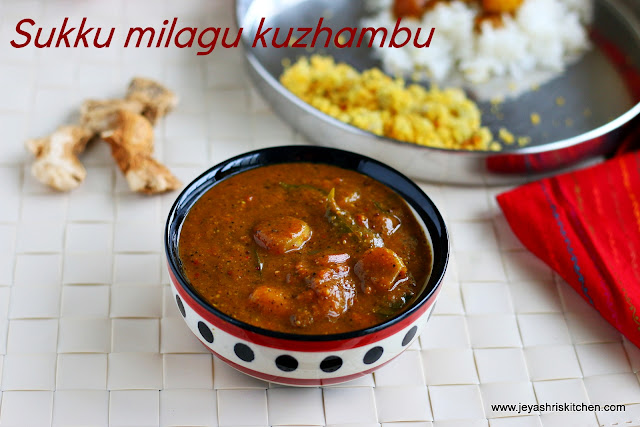
Sukku Milagu Kuzhambu | South Indian gravy recipes

Sukku Milagu kuzhambu - Recipe With video
Sukku milagu kuzhambu

Sukku Milagu kuzhambu is a south Indian gravy, made with freshly roasted pepper, dry ginger(sukku) and few other Indian spices. We make Milagu kuzhambu but this is one is slightly different form that. Few days ago, while i was cleaning  my cupboard, found a collection of old cookbooks which i had bought few years back. While i was going through the few books, i saw this sukku milagu kuzhambu and tried this today at home. From the morning it was raining here badly and so i thought this would be perfect for the rainy weather. I made Vazhaithandu (banana stem) paruppu usili to pair with this sukku milagu kuzhambu.