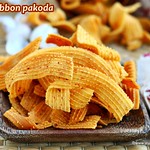
Garlic ribbon pakoda| Garlic seeval recipe, spicy garlic flavored ribbon murukku recipe with step by step pictures, a perfect savory for diwali. I have posted 3 varieties of Ribbon pakoda | ola pakoda recipe with video. I have posted garlic sev recipe too. Yesterday Varsha was telling me to make garlic flavored ribbon pakoda for Diwali. That brought me so many childhood memories. Those days garlic in cooking was so rare at home so once when i asked my grandmother to make garlic flavored ribbon pakoda, she gave a weird look and told me that we don't make those stuff at home. My friends at school bring Garlic sev and Garlic Ribbon pakoda and i used to enjoy it. We lived in Madurai and so we used to get the famous Sattur seeval, Arupukottai seeval from friends who travel to these places quite often. These cities are quite closer to Madurai and the snacks taste so yummy. They use a traditional seeval kattai for making this ribbon pakoda. But since we don't have it at home, i used the achu which i used for making the Coconut ribbon pakoda. Do try this Garlic ribbon pakoda recipe at home and let me know how you liked it. Check out our full Collection of Diwali recipes.
I followed my masala murukku | poondu murukku recipe procedure for making this garlic ribbon murukku, you can grind garlic only and add red chili powder to the flour and make the dough.

Besan | Kadalai maavu | gram flour 1 cup
Rice flour 1 cup
Red chili 7-8
Garlic 7-8 pods
Hot oil 2 tblsp + Oil for deep frying
Salt as needed


I followed my masala murukku | poondu murukku recipe procedure for making this garlic ribbon murukku, you can grind garlic only and add red chili powder to the flour and make the dough.

Garlic ribbon pakoda recipe

- Recipe Cusine: Indian
- Prep Time: 15 Minutes
- Cook time: 30 Minutes
- Serves: 3 cups approx.
- Author: Jeyashri
- Recipe Category: Snack
- Description: Garlic ribbon pakoda| Garlic seeval recipe, spicy garlic flavored ribbon murukku recipe with step by step pictures, a perfect savory for diwali
Rice flour 1 cup
Red chili 7-8
Garlic 7-8 pods
Hot oil 2 tblsp + Oil for deep frying
Salt as needed
Method :
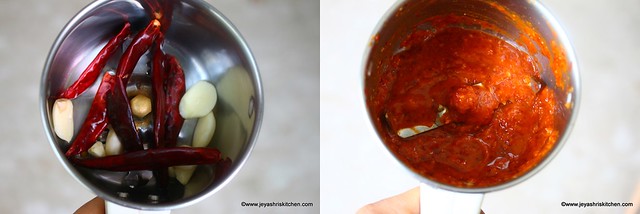
- Grind the garlic and red chili into a fine paste by adding little water to it.
- In a wide bowl add the rice flour, gram flour (kadalai maavu), salt and ground chili garlic paste.
- Add 2 tblsp of hot oil to this.
- If you want add 1 tsp sesame seeds too.
- Sprinkle water and knead into a soft non sticky dough.
- Heat the oil for deep frying.
- I used this achu for making this ribbon pakoda. Traditionally they use seeval kattai for making garlic seeval.
- We are using ribbon murukku achu.
- Put a small portion of dough into the achu and cover it.
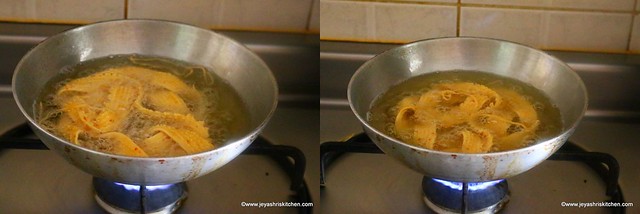
- Squeeze this into hot oil.
- Keep the flame low.
- Always keep the remaining dough covered.
- Do not disturb this for few seconds. Then slowly flip it and cook on both sides till the oil sound subsides.
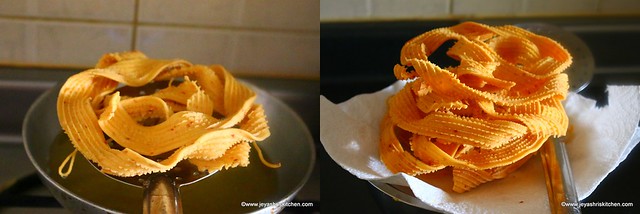
- Take it out from oil and drain excess oil in kitchen towel.
- Repeat this for the rest of the dough.
- Once it is done, gently break them.
- Store them in an airtight container.
- The Garlic ribbon pakoda tastes more flavourful after 3-4 hours.
- Enjoy the ribbon pakoda along with tea.
Notes:
- I added 7 red chili and 8 medium sized garlic. I later felt i should have added little more to this. It was medium spicy.
- Ensure oil is hot while squeezing in the ribbon pakoda.
- If making in bulk make the dough for garlic ribbon murukku in batches.

Method with step by step pictures :
- Grind the garlic and red chili into a fine paste by adding little water to it.

- In a wide bowl add the rice flour, gram flour (kadalai maavu), salt and ground chili garlic paste.
- Add 2 tblsp of hot oil to this.
- If you want add 1 tsp sesame seeds too.
- Sprinkle water and knead into a soft non sticky dough.
- Heat the oil for deep frying.
- I used this achu for making this ribbon pakoda. Traditionally they use seeval kattai for making garlic seeval.

- We are using ribbon murukku achu.
- Put a small portion of dough into the achu and cover it.
- Squeeze this into hot oil.
- Keep the flame low.
- Always keep the remaining dough covered.
- Do not disturb this for few seconds. Then slowly flip it and cook on both sides till the oil sound subsides.

- Take it out from oil and drain excess oil in kitchen towel.
- Repeat this for the rest of the dough.
- Once it is done, gently break them.
- Store them in an airtight container.

- The Garlic ribbon pakoda tastes more flavourful after 3-4 hours.
- Enjoy the ribbon pakoda along with tea.
- Ribbon pakoda stays good for a week to 10 days, but in our house it got over in few hours.

Notes:
- I added 7 red chili and 8 medium sized garlic. I later felt i should have added little more to this. It was medium spicy.
- Ensure oil is hot while squeezing in the ribbon pakoda.
- If making in bulk make the dough for garlic ribbon murukku in batches.

It is looking like good dish and i can make this for my children. Actually they are not interested to eat food in evening. I think this dish should like. Actually i am a writer so can you please send me your more like this recipe and i can easily make my article of food. Cheap essay is my website and help me to write. Anyone can use the papers as college essay examples. And, remember, all work is guaranteed to be original or your money back .It is good to see that your effort and It will helps your future to become success of life.
ReplyDelete