Saturday, September 18, 2010

PARRUPU THOGAIYAL RECIPE

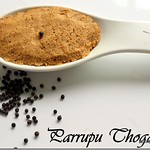
  Paruppu  thogaiyal | Paruppu thuvaiyal is a traditional recipe made using toor dal and black pepper as main ingredients, recipe given with step by step pictures. Paruppu thogayal is one of my favourite  and i love to have this with hot plain rice or for Vathakuzhambu sadam. Generally in many tamil brahmin houses it is made for Pathiyam, post partam food. We can add garlic pods in this to make it garlic flavored paruppu thogayal. Amma always makes it with Milagu kuzhambu. 
If you are a big fan of thogayals do check out

Paruppu - thogayal

Paruppu Thogayal recipe 
Paruppu Thogayal

  • Recipe Cusine: Indian
  • Prep Time: 10 Minutes
  • Cook time: 20 Minutes
  • Serves: 3
  • Author: Jeyashri
  • Recipe Category: Lunch | Dinner
  • Description: Paruppu thogaiyal | Paruppu thuvaiyal is a traditional recipe made using toor dal and black pepper as main ingredients, recipe given with step by step pictures
    Toor dal  1/2 cup    
    Black whole pepper  1/4 tsp
    Red chili  2
    Coconut   2 tblsp
    Salt  as needed
    Oil    2 tsp
    Garlic  2-3 cloves( optional)
    Asafoetida  a pinch
   

Method with step by step pictures :


  • In a pan, add the oil and throw in the toor dal, rechillies, pepper and asafoetida.
  • Saute well, and take care not to get it burnt.
  • When it is done, soak this in a cup of water for 1/2 an hour.
IMG_2062 IMG_2064
  • After 1/2 an hour ,drain the water and transfer it to the mixie jar.
  • Add coconut and salt to it and grind it into a smooth paste,by adding very little water to it.
  • If you are  adding garlic, add it while grinding. No need to roast the garlic.
  • It tastes yummy with Rasam sadam too.
Paruppu-thogayl

Sunday, September 12, 2010

Peanut chutney recipe

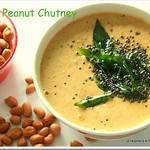
    Peanut chutney| verkadalai chutney, made using raw peanuts, red chili and garlic pairs very well with dosa and Idli. As such we all are a big fan of peanuts. This peanut chutney i  tasted in my friend’s place for the first time and i loved the taste very much. It was quite new to me and i immediately noted down the recipe from her. It was so simple and different from the usual coconut chutney i make for dosa | idli. So try out this no coconut added peanut chutney recipe.
Check out my

Peanut-chutney

Peanut Chutney recipe 
Peanut chutney

  • Recipe Cusine: Indian
  • Prep Time: 10 Minutes
  • Cook time: 10 Minutes
  • Serves: 3-4
  • Author: Jeyashri
  • Recipe Category: Breakfast | Dinner
  • Description: Peanut chutney| verkadalai chutney, made using raw peanuts, red chili and garlic pairs very well with dosa and Idli
     Raw peanuts  1/2 cup
     Red chili    5-6
     Garlic  3 cloves
    Tamarind  a tiny piece
    Salt  to taste
    Oil  1 tsp 
    Mustard seeds   1/4 tsp
    Curry leaves  few
    Asafoetida  a pinch

Method with step by step pictures :

  • In a pan add few drops of oil and add the red chili, tamarind and garlic cloves.
  • Saute till the garlic changes  color to golden brown.
  • Add the peanuts.
  • Saute  the peanuts in a pan, till it turns golden brown.
  • Be careful, it should not get burnt.

  • Switch off the flame 
  • Allow it to cool.
  • If you want to take out the skin of the peanut, you can do so by rubbing it with hands.
  • But you can proceed with grinding without taking out the skin too.
  • Add the roasted peanut, garlic, red chillies tamarind and salt and powder it in a mixie.
  • Add water to it according to your desired consistency.
  • I added 3/4 cup of water to it.
  • Add water to the powdered mixture and run the mixie.
  • Grind into a smooth paste.
  • Transfer it to a bowl. 
  • Temper it with mustard seeds, curry leaves and asafoetida.
  • Enjoy with hot idli/ dosa.
Peanut chutney
Note:
  1. If you get unsalted roasted peanuts without skin , then skip the first 2 steps.
  2. Removing the skin from it doesn't make any difference in the taste, so u can grind with the skin if u want.
  3. If you are making it frequently, then roast the raw peanuts in bulk , cool it and keep it in a air tight box.
  4. Add the water to it while grinding itself, otherwise it won't mix up well with the peanut chutney.

Wednesday, September 8, 2010

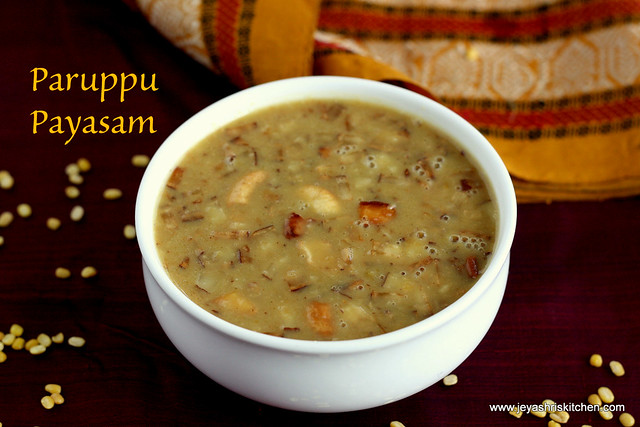
Paruppu payasam recipe, Pandigai recipes

KHEER MADE WITH MOONG DAL AND CHANNA DAL

         Paruppu payasam, a traditional payasam | kheer recipe made using Chana dal, moong dal and jaggery as main ingredients. Paruppu payasam  is made in our family during festivals like aavani avittam, ganesha chaturthi, karthigai deepam,pongal festival and other traditional festivals  also. During my Childhood days i used to hate jaggery based desserts | payasams. But now i started liking jaggery based sweets. This is one of the easiest payasam recipe which can be made so quickly.
Check out my

paruppu payasam

Sunday, September 5, 2010

Baingan Bharta recipe | Side dish for roti

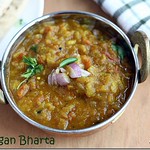
Baingan bharta recipe, smoky Roasted eggplant cooked in onion tomato based gravy, a very popular side dish for chapati in Punjabi cuisine , a treat for Eggplant lovers. Baingan Bharta very rarely takes place in my kitchen since my kids don't like brinjal , but thankfully my husband who is not a great lover of brinjals like this bharta. Recently my son started liking it much.
This recipe doesn't involve in grinding anything, but only time consuming thing is roasting of the brinjal, takes half an hour. I did the roasting on the stove top, but i think an oven can do this quickly.
If you are an eggplant lover like me, do check in our Andhra style  Gutti vangaya kura and Karnataka style Stuffed brinjal recipe. 
baingan bharta

Baingan Bharta recipe

  • Recipe Cusine: Indian
  • Prep Time: 10 Minutes
  • Cook time: 45 Minutes
  • Serves: 3-4
  • Author: Jeyashri
  • Recipe Category: Lunch | Dinner
  • Description: Roasted eggplant cooked in onion tomato based gravy, a very popular side dish for chapati in Punjabi cuisine , a treat for Eggplant lovers
     Big eggplant  1 
     Onion  2
     Tomato  2
     Green chili  2
     Coriander powder  1/2 tsp
     Chilli powder  1/2 tsp
    Garam masala  3/4 tsp
    Garlic  2 cloves
    Oil  2 tblsp
    Salt  as needed
    Coriander leaves  few

baingan bharta

Method with step by step pictures :

  • Wash the eggplant and wipe it well without any moisture.
  • Apply oil on the surface of the eggplant, for this u need few drops of oil.
  • With a knife, put a slit the eggplant and insert garlic into this.
  • Do this in 2 sides. This will give a nice smoky garlic flavour.
how to make baingan bhartha
  • Roast this on a low  flame and turn it inbetween to get it evenly roasted and get cooked inside also.
  • When it is done, allow it to cool and take the skin out.
  • Mash it nicely with ur hands.
how to broil baingan baingan bartha
  • Chop the onions finely, keep a handful of onions aside.
  • Chop the tomatoes and green chillies into small pieces.
baingan bhartha
  • In a kadai, heat oil and add the onions and green chillies.
  • Saute till the onion turns pink
  • Add the tomatoes and saute well for 3-5 mins.
IMG_2160 baingan bhartha
  • Add the garam masala powder, redchilli powder,coriander powder and turmeric powder to it.
  • Add salt according to your taste.
  • Mix well and add the mashed baingan/eggplant to it.
  • Add 1/4 cup of water to this mixture and mix well.
Baingan bharta IMG_2164
  • Before serving add coriander leaves and a handful of raw onions(which we kept aside while chopping)
  • The crunchiness of onion in the gravy enhances the taste.
baingan bhartha
  • Serve hot with roti/naan.
Notes:
  1. Adding garlic while roasting enhances the flavour of the baingan bharta. 

Thursday, September 2, 2010

APPAM RECIPE | WHEAT FLOUR APPAM RECIPE

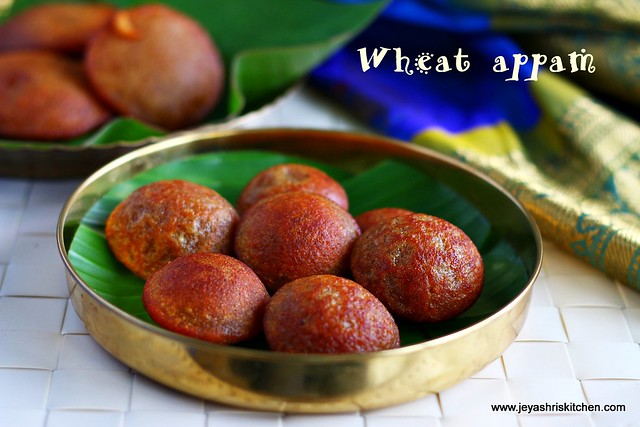
   wheat-appam
 Appam is a sweet dish made with wheat flour and this is my daughter’s favorite. Normally this is made during Ganesha Chaturthi |Vinayagar Chaturthi. I made this for Janmashtami yesterday. Along with i made murruku, thattai, milk peda, and aval. Also this can be made for Karthigai deepam too.
Here is the recipe of sweet appam with whole wheat flour and jaggery. Check out the deep fried version of this Wheat appam.

Monday, August 30, 2010

METHI PARATHA RECIPE

I have attempted methi parathas very few times and i don't have a proper recipe, and very recently i got this recipe from my friend,who makes this very nicely. So after knowing the proper recipe, now i wanted to try this and blog this one. So without any delay i went to the market the next day and bought these fresh methi leaves and tried the paratha. Check out my methi thepla recipe too.


It came out very nice and  i loved the texture of the dough while rolling it.
methi paratha

Methi paratha

  Preparation Time : 15 mins | Cooking Time : 25Mins |Serves: 3-4

     Methi leaves   1 small bunch
     Whole wheat flour   2 cups
     Salt  as needed
     Milk   1/2 cup
     Coriander powder   1/2 tsp
     Red chili powder  1 tsp
     Turmeric powder   1/4 tsp
     Garlic  (crushed)  2-3 cloves
     Cumin seeds   1/4 tsp
     Ajwain | Omam  2 pinches
     Oil   1 tblsp
     Water    as needed
     Garam masala   2 pinches


Method:

  • Clean the leaves and cut them into finely.
  • Wash them thoroughly
  • Crush the garlic (a mortar and pestle can do this job)
  • In a kadai, add 2 tsp of oil and put the cuminseeds and crushed garlic.
  • Just saute them for a minute .
Methi paratha
  • Add the methi leaves and throw in the chilli powder,coriander powder ,turmeric powder ,salt and garam masala(if using).
  • Saute for 3-5 mins.
methi paratha
  • Now switch off the flame and add this mixture to the atta flour
  • Mix this nicely.
  • Add the ajwain seeds.
  • Add the milk and start kneading it into a smooth dough.
  • Add water also as the quantity of milk won’t be sufficient to knead the dough.
  • Add a tsp of oil to the dough and cover it with a lid and let this it for half an hour.
Methi paratha Methi paratha
  • Make equal balls out of these dough and roll them into circles.
  • Since i decided to make   parathas ,i rolled it into little thick circle.
Methi paratha
  • Heat a tawa and  put the paratha in it.
Methi paratha Methi paratha
  • When it is done on both sides,add a tsp of oil and transfer it to a plate.
  • Repeat this process for the rest of the balls.
  • Serve hot with any pickle/yogurt.
Methi paratha
Note:

  1. You can replace homemade sambar powder  for chilli powder and coriander powder.
  2. Adding garlic to this will subdue the flavour of methi , but not much more.
  3. If you want the flavour of methi leaves in particular, just skip the procedure of adding garlic.
  4. Sauting methi leaves will reduce the bitterness of the leaves.

Wednesday, August 25, 2010

PEAS PULAO RECIPE

Green peas pulao  is an easy and simple dish with minimum ingredients. This finds place in my kitchen once a week, especially when i get up late and run out of time. Generally i make cauliflower curry as an accompaniment for this. It is different from the Vegetable Pulao which i make usually.
Whenever i pack this for my daughter’s lunch box, i pack seperate box for her friends too, who loves this a lot.
peas pulao

Peas pulao recipe

  Preparation Time : 15 mins | Cooking Time : 25 Mins |Serves: 6

     Basmati rice   1 cup
     Green peas     1/4 cup
     Ginger garlic paste   1 tsp
     Green chili   1
     Ghee  1 tsp
     Oil   1 tsp
     Salt   as needed 


Method:

  • Wash the rice and soak with 1 and 1/4 cup of water for 20 mins.
  • In a pan ,put the ghee and oil and add the ginger garlic paste.
  • Saute in a medium flame till the raw smell goes.
  • If adding green chilli, slit it into two , and add at this stage
  • Then add the soaked rice to it keeping the water aside.
  • Fry for 5 mins.
peas pulao peas pulao
  • Transfer it to rice cooker/pressure cooker.
  • I used the rice cooker.
  • Add salt and the water and close the lid.
  • When it is done ,add the frozen green peas to it.
peas pulao
  • If not using the frozen one,just microwave the fresh peas for 5 mins with little water and by adding little salt to it.
  • Adding peas in the end retain the green colur of the peas and will look very nice.
peas pulao

Monday, August 23, 2010

MIXED VEGETABLE CURRY | SIDE DISH ROTI

      Mixed veg curry, is a tomato based vegetable gravy, pairs well with phulkas | parathas. I usually make with frozen vegetables and can be done with fresh veggies too.
Even it goes well with ghee rice | jeera rice.
Check out my

Mixed veg curry

Thursday, August 19, 2010

JANGIRI FOR 1st BLOG ANNIVERSARY

My blog is celebrating 1st anniversary today. So i wanted to make a sweet dish to celebrate this day.
Jangiri
I started browsing for recipes in internet, 2 years back. I always try recipe from blogs. I slowly started making very few friends out of this and i mail them regarding my doubts and i get quick response from them.
I never thought of starting a blog on my own. Among the few friends i made Raji of Raks Kitchen  got close to me. We both stayed in singapore and that time i was new to singapore too, she answered all my queries patiently. She always insisted me to start a blog, but i am so scared to commit anything new, since i am packed up with my household work and managing both the kids.
Finally after a year, i started a blog with her help and she taught me everything regarding “how to start a blog”.
For the past oneyear i have learnt a lot and still learning. Here i want to thank one of our fellow blogger Lavanya of Cookery corner, who also insisted me to start a blog.. She is very sweet friend and answered all my queries with utmost patience.
So for this anniversary i wanted to try Jangiri from Raks Kitchen. I have tried this very long back, but first time it didn't come out well. This time it came out very great.
My family enjoyed it a lot.
Jangiri

I followed the same recipe from her blog. Please refer to the link above for the recipe.
I thank all my followers, readers and friends who are spending their time in reading my posts , commenting and trying my recipes. Thank u very much for your encouragement and support.
See you all soon with interesting post.

Monday, August 16, 2010

BISIBELABATH RECIPE | HOW TO MAKE BISI BELE BATH

Recipe of bisi bela bath with video   

Bisi bela bath – a delicious meal comprising of rice, lentils and vegetables. Bisi bela
bath or Sambar rice is a very popular, traditional South Indian, one pot meal from
the Karnataka cuisine. Infact, it is a signature dish of the MTR chain of restaurants.
Everybody in my family loves it a lot. I made this last week for the Singapore
food blogger’s potluck party and we all enjoyed it.
I learnt this recipe from my mother about ten years back. After several attempts, I
am not satisfied with the outcome. Cooking Bisi bela bath takes time and we need
patience to get the right consistency. An authentic Karnataka style Bisi Bela Bath
includes a few more spices like cinnamon and star anise. Since, I am not
particularly fond of these spices in the Sambar rice I have customized it to my liking.
Usually, dry coconut or kopra is added to enhance the flavor of this dish. However,
it can also be made using fresh coconut. Also check out,

bisibelabath