Showing posts with label Pickle. Show all posts

Thursday, January 17, 2013

GARLIC PICKLE RECIPE | EASY PICKLE RECIPES

Though i love the addition of garlic in pickle i have never tasted garlic pickle. But my sister who is good at making this garlic pickle was insisting me to try this garlic pickle and wanted me to post in my blog for a long time. Somehow i couldn’t make it , but when i got a reader request for this recipe, i asked my sister during my visit to India in December and immediately noted down it and made it after coming back to Singapore. It tasted very well and we all loved it so lets see how to make instant garlic pickle.
Garlic Pickle 4
INGREDIENTS:
GARLIC 2 BULBS
SESAME OIL 2 TBLSP
METHI SEEDS(VENDAYAM) 3/4 TSP
REDCHILLI 5-8
CUMIN SEEDS 3/4 TSP
TAMARIND EXTRACT 1/4 CUP
JAGGERY 1/2 TSP
SALT AS NEEDED
Garlic pickle 2
METHOD:
  • Dry roast the red chilli, cumin seeds, methi seeds and add salt in the last.
  • When it cool and grind into a fine powder.
garlic pickle step 2 garlic pickle step 5
  • Take out the skin of garlic. Add oil in a pan and add the garlic pearls to the oil and saute in a low flame till it turns golden brown.
garlic pickle step 3 garlic pickle step 7
  • Now add the ground spice mix and saute for 2 minutes and add the tamarind water and jaggery. 
  • Mix well and saute for 2 mins and switch off the flame. you can add a tsp of sesame oil if you want.
garlic pickle step 8 garlic picklestep 9
  • Transfer it to a dry container. Enjoy with curd rice and even with sambar rice too.
Garlic pickle 3         
Note:
  1. This yielded 1/2 cup of garlic pickle.
  2. Always use dry spoon to take out the pickle.
       

Monday, August 27, 2012

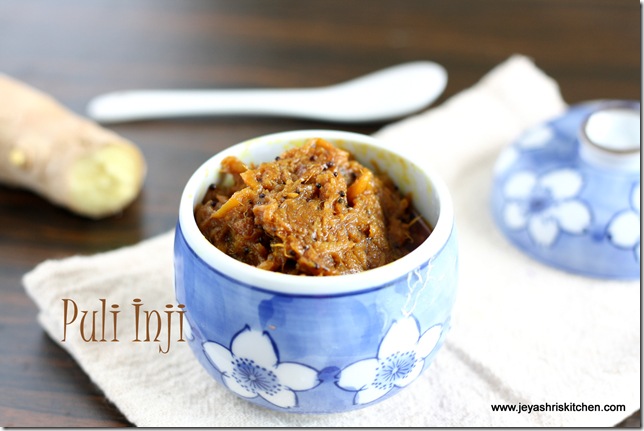
PULI INJI RECIPE

When i posted the recipe of Puli Milagai few weeks back, a few readers sent me the request for puli inji recipe. Though my mom makes puli inji at home being a ardent hater of Ginger, i somehow postponed to make puli inji. But recently when i tasted this in my friend’s place i somehow liked the taste and decided to make puli inji and post the recipe. Normally it is one of the dish made in Onam Sadhya Menu.
Also check out my

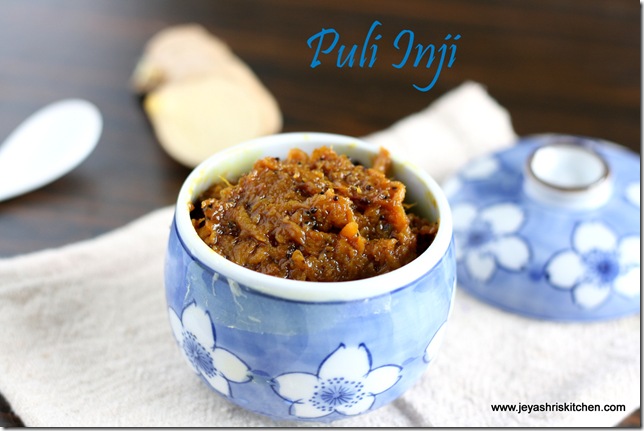
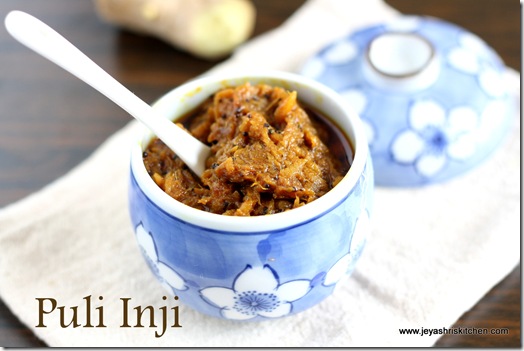
puli inji
INGREDIENTS:
GRATED GINGER 1 CUP
SESAME OIL 4-5 TBLSP
MUSTARD SEEDS 1/4 TSP
ASAFOETIDA 1/4 TSP
TAMARIND EXTRACT 1 CUP
RED CHILLI POWDER 1 TSP
SALT AS NEEDED
JAGGERY 1-2 TBLSP
TURMERIC POWDER 2 PINCHES
PULI INJI
METHOD:
  • In a pan add oil and throw in the mustard seeds and asafoetida.
  • When the mustard splutters, add the grated ginger.( grate the ginger finely)
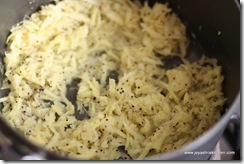
IMG_7480 IMG_7481
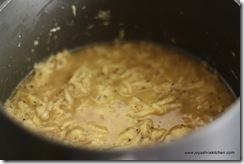
  • Saute the ginger for 2 minutes and add the tamarind extract.
  • To get the tamarind extract, soak a lemon sized tamarind in hot water and extract the water as we do for making sambar.
IMG_7485 IMG_7486
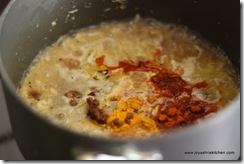
  • Add the red chilly powder, salt, jaggery,and turmeric powder.
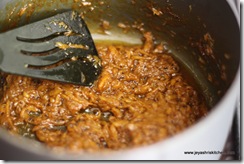
  • Keep it in a low flame and let it come to a mass.
  • this will take 10 –14 minutes.
IMG_7488 IMG_7490
  • When the ginger gets completely cooked and the oil starts leaving the sides, switch off the flame.
  • Allow this to completely cool and store it in a clean dry container.
  • Use dry spoon when ever you take it for use.
puli inji
Note:
  • 2-3 green chilli can be added while tempering mustard seeds.
  • Coconut oil can be used if you want to get authentic kerala taste.

Wednesday, April 25, 2012

LEMON PICKLE RECIPE | PICKLE RECIPES

       This is the first time i tried lemon pickle at home, though my mom is an expert in making different types of lemon pickles ,since my dad is a huge fan of lemon pickle. As  i am not a big fan of this lemon pickle i never tried on my own. I always make pickles with mangoes but after coming to Singapore i never made anything . When a reader asked me to post this lemon pickle i asked my mom for the recipe and the entire process of making lemon pickle took a month and now on to the recipe of lemon pickle . 
LEMON PICKLE   
INGREDIENTS:
LEMON( I used Indian lemon) 6 NO
RED CHILI 8-9 NO
TURMERIC POWDER 1/2 TSP
VENDAYAM(FENUGREEK SEEDS) 1/2 TBLSP
SESAME OIL 1/4 CUP + 3 TBLSP
MUSTARD SEEDS 1/2 TSP
SALT 1/2 TBLSP+ 2 TSP
ASAFOETIDA 1/2 TSP
PICKLE
METHOD:
  • Wash the lemons and pat dry them nicely in a kitchen towel.
  • Ensure that there should not be any moisture.
IMG_9859
  • Wash and clean a glass bottle and nicely dry this without even a drop of water.
IMG_9856
  • Cut the lemon into two and slightly squeeze out the juice. Do this very gently, else the pickle will become bitter.
  • This step is lessen the sourness of the pickle.
  • Gently remove the seeds with the help of a knife.
IMG_9862 IMG_9863
  • Cut the lemon into small  size pieces.
IMG_9864
  • Immediately add salt and asafoetida and mix well.
  • In a pan dry roast the fenugreek seed till they become slightly brown.
  • Do not roast too much as this will make the pickle bitter.
IMG_9865
  • Dry roast the red chilies  in a pan.
IMG_9866
  • Grind the redchillis and fenugreek seeds together into a fine powder.
IMG_9867
  • Throw this onto the cut lemon and mix nicely using a dry spoon.
IMG_9868 IMG_9869
  • In a pan heat the oil and throw in the mustard seeds.
  • Add this to the pickle and add turmeric powder and mix well.
IMG_9871
  • Transfer this to the glass bottle and cover this with a thin muslin cloth and tie this with the help of a rubber band.
IMG_9873
  • Keep this in sunlight for 3 –4 weeks ( inside the home where you get bright sunlight)
  • Every day with the help of a dry spoon mix the pickle nicely and close it.
  • No need to keep in the refrigerator.
  • After 4 weeks the skin of the lemon  will be soft and the lemon must have absorbed the spices.
pickle
  • Now keep it in the fridge and enjoy with curd rice and love to have pickles with sambar rice too.
lemon pickle
Note:
  • In any step , ensure that there shouldn’t be any moisture and keep you hands always dry.
  • The containers you use should be dry and spoons too.
  • Always take care not to burn the vendayam and red chilis. This will make the pickle bitter.
  • sometimes my mom pressure cook the cut lemon pieces for a whistle but this will not have longer shelf life.
  • In this method, no need to keep it under the sunlight, just can be consumed immediately.
  • The oil will  be dried up , so after 4 weeks heat 2 tblsp of sesame oil and add to the pickle and mix well.

Saturday, April 23, 2011

Raw mango pickle,Instant mango pickle recipe

Instant mango pickle

    Instant mango pickle recipe,raw mango oorugai,a  simple mango pickle recipe that goes well with curd rice and I love to eat this with  to have them with Bisibelabath. We call it as venthaya maangai or kalyana maanga oorugai. The crunchiness of the maanga with the fresh spices gives a nice taste to this pickle. Even we used to have a spoon of raw mango pickle with our evening coffee or tea. In our home we all are a big fan of this Instant pickle. In Singapore, we get Raw mango throughout the year. Now comes the recipe for the RAW MANGO PICKLE.
Check out my
Instant manga oorugai


Instant mango pickle
Raw mango pickle

Recipe Cuisine: IndianRecipe Category: Pickle
Prep Time: 10 mins   |  Cook time: 2 mins serves: 4-6 | Author:
Instant mango pickle,raw mango oorugai,a quick pickle pairs well with curd rice.
   Raw mango  2 cups (cut into small)
   Red chili powder  2 tsp
   Mustard seeds  1 tsp + 1/2 tsp
   Methi seeds| Venthayam  1 tsp
   Sesame oil | nallenai  3 tblsp
   Salt  as needed
   Asafoetida  a generous pinch 


Raw mango pickle

Method with step wise pictures: (updated)


  • Cut the mangoes into small bite size pieces.
  • Dry roast the fenugreek seeds,1 tsp mustard seeds for 3 minutes.
instant mango pickle
  • Allow it to cool and finely powder it in the mixie.
  • We use only 1/2 tsp of this powder. You can store the remaining for the next time use.
  • Add the red chilli powder, salt and 1/2 tsp dry roasted powder to the cut mango.
  • Heat up the oil and throw in the mustard seeds and asafoetida.
  • Pour the oil over the cut mango and mix nicely.
  • Mango pickle is ready to serve.
  • It can be stored  in the fridge for 3-5 days.
  • Always use a clean dry spoon to take the pickle.
instant mango pickle recipe


Tuesday, March 1, 2011

KOTHAMALLI THOKKU RECIPE, CORIANDER LEAVES THOKKU

          Kothamalli thokku recipe with step by step pictures.
Though i have attempted making thokku with Tomato,i never tried  kothamalli thokku on my own. Few weeks back, when i was  talking to a friend she was telling that she made kothamalli thokku that afternoon. After hearing the recipe, i wanted to give it a try ,since it was so simple to make.
            Thanks J, for the recipe.
thokku
CORIANDER LEAVES 2 BIG BUNCHES
RED CHILLIS 8-10 NO
TAMARIND A SMALL GOOSEBERRY SIZE
SESAME OIL 4 TBLSP
MUSTARD SEEDS 1/4TSP
ASAFOETIDA 1/4 TSP
SALT AS NEEDED
Picture Updated on 23-1-12
thokku

METHOD:
  • Wash the coriander leaves and cut them with the help of kitchen scissors. Discard the stem.
  • In a kadai, add few drops of oil and roast the redchillis ,tamarind and asafoetida.
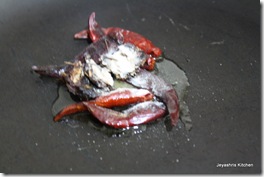
IMG_5926


  • Allow this to cool and grind this along with the coriander leaves along with salt.
    IMG_5928 IMG_5930
    • In a kadai, ad the sesame oil and throw in the mustard seeds.
    • When it splutters add the ground coriander leaves to this and saute in low flame.
    IMG_6651 IMG_6654
    • Saute till the oil leaves on the sides and it gives a nice aroma.
    • This will take approximately around 10-12 minutes.
    • Allow it to cool and transfer it to a container.
    • This can be stored in the fridge for 10-15 days.
    • This thokku tastes well with curd rice and Paratha.
    thokku


    Note:
    1. You can replace the redchilli with green chilli also.
    2. A tsp of jaggery can be added to the kothamalli thokku.