Showing posts with label Pickle. Show all posts

Tuesday, April 16, 2019

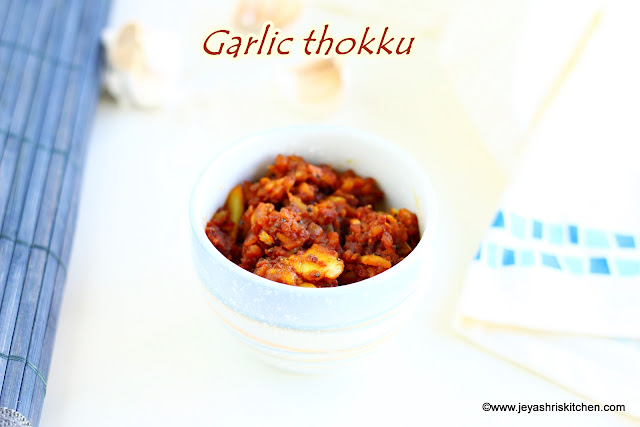
Poondu thokku recipe, Garlic thokku

Poondu thokku recipe| garlic thokku, with step by step pictures and video, a simple and easy to make thokku recipe made using garlic. I have got a reader request to post this recipe of poondu thokku long time back. I have already posted garlic pickle recipe but somehow i couldn't get any satisfying thokku recipe. Recently when i visited my friend Lakshmi's mom, she made an amazing Poondu thokku and i immediately noted down the recipe from her. The only toughest part is peeling the garlic but it is worth the effort. The poondu thokuu tasted so yum.
Generally we don't consume pickles so much. I always make in small batches whenever needed. My mom makes maavadu in bulk, for a year and also mango thokku for 6-8 months too. In my in laws house we don't eat much of pickles, so i didn't take up the tradition of making variety of pickles in Summer. But i have posted few popular South Indian pickles like, Instant Lemon pickle, Gooseberry pickle, Avakaai mango pickle, mango thokku and few more.
Amma used to make maavadu in bulk and send it to my athais too, during my childhood days. The maavadu we get in Madurai will be so good and also the prices will be less compared to the ones in cities.
Garlic thokku
Do try this Poondu thokku recipe and let me know how it turned out. 

Wednesday, April 10, 2019

Vendhaya keerai thokku, Methi leaves thokku

Learn how to make Vendhaya keerai thokku with video and step by step pictures. Methi leaves thokku| vendhaya keerai thokku is a popular no onion no garlic thokku available in Grand sweets chennai. I have tasted this long time back in a friend's place during Navaratri and was too much hooked by its taste. After that i completely forgot about the thokku. Recently while i was seeing the fresh vendhaya keerai in the market, i thought i will try out this vendhaya keerai thokku. As it is holiday season, this Vendhaya keerai will be perfect for long distance travels. Also this is a perfect one to send it for kids who study abroad. They can mix this with rice and have it with plain yogurt too.
Vendhaya keerai thokku

In South Indian Thokku varieties, pickle varieties, podi varieties, asafoetida plays a great role in enhancing the taste and flavour. It gives a nice aroma to the dish. I used SSP asafoetida, the no gum added asafoetida, the new shaker bottle and that did a magic in the taste. I have used SSP asafoetida in my coconut hing chutney recipe. This time we get the asafoetida  in a new shaker bottle which is super easy to handle. Asafoetida is used in South Indian cuisines more widely. And in rasam, sambar and kootu recipes it is one of the main taste enhancer.  Though it is slightly priced higher compared to other brands, but a very tiny pinch of  SSP asafoetida gives more flavour to the dish. So if a recipe calls for 1/4 tsp of asafoetida, when you are using SSP perungayam, you can use 1/8th tsp of it. Their products are available Amazon and for my readers in Singapore, you can buy from Saravana stores Singapore, located at Rangoon road. They have a wide range of products and i used Ultra powder asafoetida in this recipe. To buy SSP asafoetida Please visit  Amazon link for purchase and also the SSP pandian website to see about their wide range of products.
SSP asafoetida


Vendhaya keerai thokku

  • Recipe Cusine: Indian
  • Prep Time: 10 Minutes
  • Cook time: 35 Minutes
  • Serves: 1 cup
  • Author: Jeyashri
  • Recipe Category: Lunch | Dinner| Breakfast
  • Description: Learn how to make Vendhaya keerai thokku with video and step by step pictures.
     Vendhaya keerai  2 cups
     Red chili    10-12
     Urad dal  1 tblsp
     Channa dal  1 tblsp
     Dhaniya | coriander seeds  1 tblsp
     Asafoetida | hing  1/4 tsp
    Sesame oil  3 tsp + 2 tblsp
    Salt  as needed
    Tamarind  a small lemon sized.
    Mustard seeds   1/4 tsp
    Jaggery   a small piece

Method  :

  • Wash the vendhaya keerai| methi leaves and pat dry it. 
  • Take out the leaves and keep it aside. No need to chop the keerai.
  • Soak the tamarind in hot water and keep it aside.
  • In a pan add 1 tsp oil and add the red chili, coriander seeds, chana dal, urad dal and 1/8th tsp of asafoetida. I used SSP powder asafoetida. 
  • Saute till the dals turn nice golden colour.
  • Once done switch off the flame. 
  • Add the venthaya keerai to this. Saute in that heat itself and allow this to cool completely. 
  • Let it be in the pan itself. 
  • Once it is cool grind this into a fine paste. 
  • You can add water to this. I added 1/2 cup of water while grinding. 
  • Extract the tamarind juice from the soaked tamarind using 3/4 cup of water.
  • In a pan add 2 tblsp sesame oil and add the mustard seeds. 
  • Add the 1/8th tsp of asafoetida. 
  • Once the mustard splutters add in the tamarind extract. At this stage always simmer the flame or better to switch off an add the tamarind juice. 
  • Add the ground vendhaya keerai paste to this. 
  • Add salt and the jaggery to this.
  • Mix well.
  • Cook this in a medium low flame for 10- 15 minutes. 
  • The mixture will come to a thokku consistency.
  • Do not cook in high flame as this will splutter. 
  • Switch off the flame and smear 2 tsp of sesame oil. This step is optional. Add oil only if you want. 
  • But it gives a nice glossy texture and enhances the taste. 
  • Allow this to cool completely.
  • Transfer this in a clean dry jar.
  • Store this in the refrigerator. If using for travel, you can easily keep it in room temperature for 2-3 days. As the summer is too high we can't keep it outside for more than 3 days.
  • Enjoy the vendhaya keerai thokku with curd rice, idli, dosai and chapathi.
  • You can mix this thokku with rice and temper with peanuts and pack for lunch box too. 
Notes:
  1. Always keep this thokku in a clean dry jar and use clean dry spoon to handle it.
  2. This Vendhaya keerai thokku stays good for 20-25 days in refrigerator.
    

    Video of how to make Vendhaya keerai thokku


Method with step by step pictures :

  • Wash the vendhaya keerai| methi leaves and pat dry it. 
  • Take out the leaves and keep it aside. No need to chop the keerai.
  • Soak the tamarind in hot water and keep it aside.
  • In a pan add 1 tsp oil and add the red chili, coriander seeds, chana dal, urad dal and 1/8th tsp of asafoetida. I used SSP powder asafoetida. 
  • Saute till the dals turn nice golden colour.
  • Once done switch off the flame. 
  • Add the venthaya keerai to this. Saute in that heat itself and allow this to cool completely. 
  • Let it be in the pan itself. 
  • Once it is cool grind this into a fine paste. 
  • You can add water to this. I added 1/2 cup of water while grinding. 
  • Extract the tamarind juice from the soaked tamarind using 3/4 cup of water.
  • In a pan add 2 tblsp sesame oil and add the mustard seeds. 
  • Add the 1/8th tsp of asafoetida. 
  • Once the mustard splutters add in the tamarind extract. At this stage always simmer the flame or better to switch off an add the tamarind juice. 
  • Add the ground vendhaya keerai paste to this. 
  • Add salt and the jaggery to this.
  • Mix well. 
  • Cook this in a medium low flame for 10- 15 minutes. 
  • The mixture will come to a thokku consistency.
  • Do not cook in high flame as this will splutter. 
  • Switch off the flame and smear 2 tsp of sesame oil. This step is optional. Add oil only if you want. 
  • But it gives a nice glossy texture and enhances the taste. 
  • Allow this to cool completely.
  • Transfer this in a clean dry jar.
  • Store this in the refrigerator. If using for travel, you can easily keep it in room temperature for 2-3 days. As the summer is too high we can't keep it outside for more than 3 days.
  • Enjoy the vendhaya keerai thokku with curd rice, idli, dosai and chapathi.
  • You can mix this thokku with rice and temper with peanuts and pack for lunch box too. 
vendhaya keerai thokku

Notes:
  1. Always keep this thokku in a clean dry jar and use clean dry spoon to handle it.
  2. This Vendhaya keerai thokku stays good for 20-25 days in refrigerator.
  3.     

Wednesday, April 3, 2019

Magali Kizhangu Urugaai, South Indian pickle

Magali kizhangu urgaai| mahali kizhangu pickle, is a popular tamil brahmin style, zero oil pickle recipe. The Mahali root has lots of health benefits, mainly it helps in purification of blood. When it comes to the taste of the pickle, it has 2 extremes, either people will love it the most or hate to the core. Many don't like even the smell of the magali root. But for the magali pickle lovers it's a heavenly combo with curd rice. Generally curd is added to this pickle and popularly known as Magali thayir oorugai. Though i don't like this magali pickle(yes 😉) i wanted to document this heirloom recipe in jeyashri's kitchen.
My brother in law got this magali kizhangu from West mambalam station road, Chennai.
This Magali pickle recipe comes with an amature video of my mom telling how to make the magali pickle. I was insisting her to tell her on the same day we made the pickle but she was too much tied with other chores and was reluctant to stand for a video. Also i stayed in her place for a day only. Yesterday my sister sent me this video, took from her mobile. Even the step by step pictures are taken by me using mobile as i didn't take my camera during this vacation.
Stay tuned to more pickle recipes coming up in Jeyashri's kitchen.

Thursday, March 28, 2019

Kerala Mango pickle recipe,Instant Mango pickle

Kerala Mango pickle , Instant mango pickle |Kadumanga aachar an easy and quick mango pickle recipe, recipe with video and step by step pictures. I have heard about Kerala mango pickle  but never know what it is about. This is very similar to the Instant mango pickle which i posted earlier but with a small difference. Recently i met my friend's mom who is a native of Kerala, asked her the recipe of Kadumanga pickle and tried it the next day at home. It was quite tasty and we enjoyed with bisi bela bath. Check out my
  1. Maavadu recipe
  2. Avakkai pickle recipe
Kerala mango pickle

Tuesday, January 30, 2018

Mango Ginger Thokku recipe | Maa inji thokku

Mango ginger thokku recipe | Maa inji is a seasonal root vegetable,which is generally used to make pickle. I have already posted a very simple version of no cook maa inji pickle. During my childhood days i never liked this mango ginger, but some how when i started making this after marriage, i started liking the pickle slowly. Though we make the simple version of the maa inji pickle, never tried the thokku version. I got a bunch of maa inji from little India market last week. I some how vaguely remember that my friend makes this thokku and pinged her for the recipe. She told me that it is similar to the mango thokku and gave me few tips too. Try this at home and let me know how you liked it.
Maanga inji thokku

Monday, August 28, 2017

Green apple pickle | Instant pickle recipe

Instant green apple pickle is an easy pickle recipe, tastes similar to the raw mango pickle. Though i tried this few times, happened to post this in Jeyashri's kitchen Instagram few weeks back. Many asked for the recipe of green apple pickle. Though it is similar to the instant mango pickle, i wanted to make a separate post for the recipe of Green apple pickle. This goes well with curd rice and sambar rice too. If the apple is sour, you can go ahead and make pickle. I have scheduled this post for next week as i have guests coming up next week. But there was some issue with my camera and few step wise pictures which i took for today's post went missing. So i thought of publishing this recipe today. Will post Onam sadhya recipes from tomorrow.
Green apple pickle

Friday, April 29, 2016

Punjabi Mango Pickle recipe | Indian Pickle recipes


Punjabi mango pickle | aam ka achar is a popular pickle recipe of North India, usually made in summer season and stored for a year. I have posted mango thokku, avakkai mango pickle recipe . This aam ka achaar is a north indian style of mango pickle, which i have tasted in many Indian restaurants here. Generally it is served with parathas. But it goes well with our south indian curd rice too. One my friend's mother in law passed on this recipe to me and it turned out so nice and tasted the same as we get in restaurants.

Tuesday, March 8, 2016

Molaga Thokku recipe | Green chili pickle


Pacha milagaai thokku | green chili pickle is an easy thokku made with green chili and this is an ultimate combo for curd rice and dosa. My grandma is a great fan of this thokku and always make this in bulk and keep . But consuming this daily is not so good for health as it generates heat in the body. Though my mom tell her, not to eat this often, she never listens. When i started making this molaga thokku today, and when the aroma of the thokku started coming, it brought back all the memories of my childhood days. It has been a long time since i  was planning to post this recipe in jeyashri's kitchen. Last week i picked up nice fresh green chilies from the market and finally made it today. The tamarind and  jaggery balance the spiciness of the thokku.
Check out my puli milagaai recipe too.

Monday, August 17, 2015

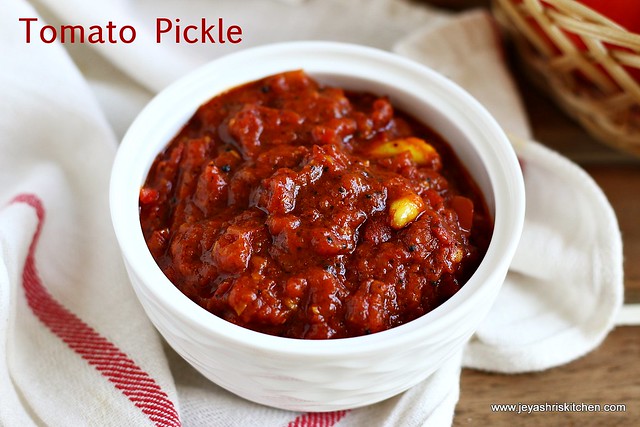
TOMATO PICKLE RECIPE |EASY PICKLE RECIPES

Tomato- achaar
I am a big fan of home made tomato thokku.  When i was casually talking with a friend in chennai, she was telling tomaotes were in season and they are getting nice red tomatoes. Suddenly the recipe i bookmarked from here few days back flashed my mind. So decided to give it a try. It slightly altered the method of making it. It turned out so well and i am enjoying this thokku for my dosa, idli , parathas, upmas and what not. Make it today and enjoy it for a week. Check out my tomato biryani, tomato pureeTomato sweet jam.

Thursday, April 23, 2015

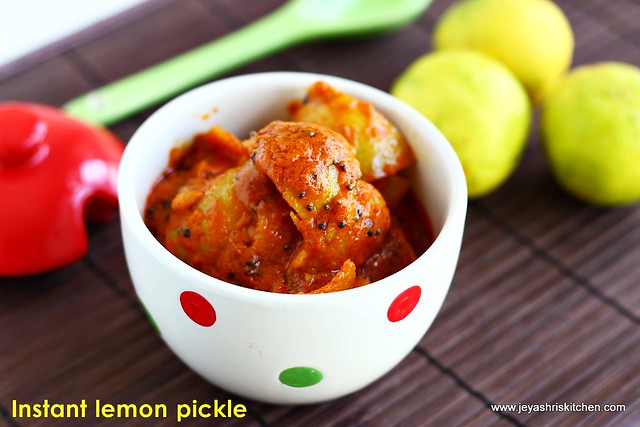
INSTANT LEMON PICKLE RECIPE| EASY PICKLE RECIPES

Instant-elumichai oorugaai
I have already posted a lemon pickle recipe few years ago. Amma makes an instant lemon pickle |elumichai oorugaai in tamil, by using pressure cooker method. Yesterday when we went to little india to buy vegetables, seeing the cute lemons in the market, i picked few to make some juice.(posting the a new recipe soon) Amma picked few more to make this instant lemon pickle. While coming back i was asking as how to make the instant pickle. The method she explained was so easy and today morning i made this while she was watching tv. She loved the pickle and though i am not a big fan of lemon pickle i liked it very much. The pickle was not so bitter and since the it is pressure cooked the skin was so soft too.

Tuesday, July 1, 2014

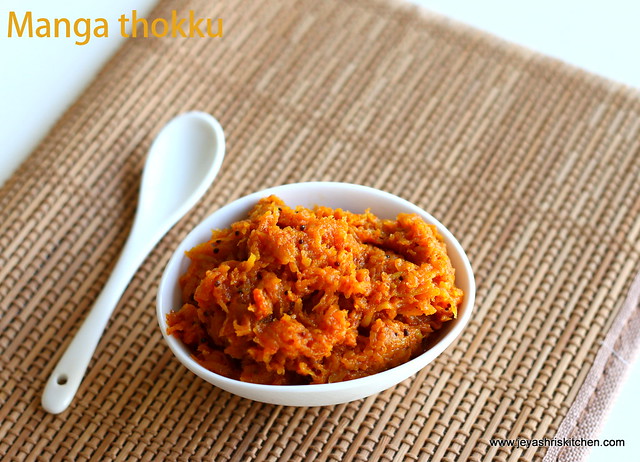
MANGO THOKKU | MANGA THOKKU RECIPE

Manga-thokku
Mango thokku or manga thokku is one of my most favorite pickle. A best accompaniment for sambar rice, upmas, parathas and curd rice. My mom makes this very well and i still remember the days when she used to make mango thokku in bulk and store for 4-5 months. I made this thokku and clicked long back but it was lying in the draft for a long time. We are just back from a fantastic and fun filled India trip. Will get back to routine in a  day or two. Let me first finish off posting the recipes lying in my draft and will start with the new one from the next week.
Also check out my

Monday, April 28, 2014

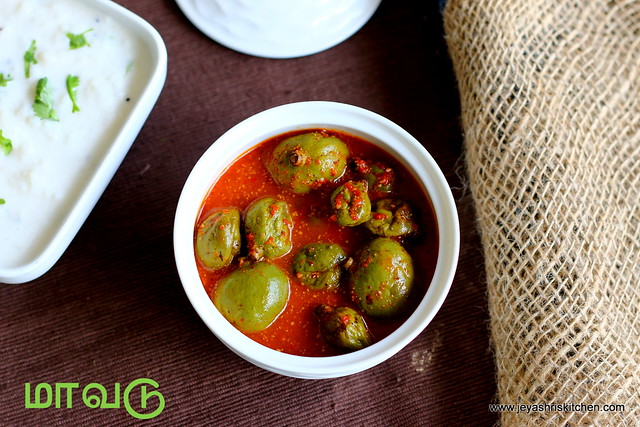
MAAVADU RECIPE | VADU MANGO PICKLE | PICKLE RECIPES

pickle-recipes

Vadu mangai or maavadu , generally we get in summer season and i remember accompanying my mom to the central market in my town, to buy the tender mangoes . We make pickle out this vadu mangai . My mom always buy this vadu manga in bulk (10 padi) and she makes pickle in big jars and share with my athais who are all big fan of vadu manga pickle. Though i am not a big fan of maavadu i enjoy seeing this procedure of making maavadu. I love the maavadu water very much, a perfect combo for Curd rice. Make this easy maavadu pickle this summer and enjoy them with curd rice.

Monday, March 17, 2014

AVAKKAI PICKLE|AVAKKAI MANGO URUGAAI |INDIAN PICKLE RECIPES

Avakkai- pickle Avakkai mango pickle , the one of the most favorite dish i love to make. I learnt this during my early days of marriage from my athai(aunt) . She is an expert in doing this and she used to send big bottles of pickles to me after i got married. She was staying close to my in-laws place. I always wanted to learn the recipe from her and when i asked her she beautifully explained me the procedure. The next year she sent me raw mangoes and i made it according to her instructions. It came out extremely well. After coming to singapore, i never put this avakkai pickle and suddenly 2 weeks back i thought i should make this. I bought mango from little india, but here we don't get it cut with the seed intact. In chennai, they will cut and give.
Followed my athai's recipe and it turned out very well. Sharing the recipe of avakkai pickle today.

Tuesday, February 4, 2014

MAANGA INJI PICKLE | MANGO GINGER PICKLE | PICKLE RECIPES

Mango ginger pickle
Mango ginger pickle or Maanga inji pickle is a simple pickle which we make when mango inji is available in the market. This pickle doesn't involve any cooking and we don't use oil while making this pickle. During my trip to Chennai in December, when i was walking through the streets of Station road in West Mambalam , i bought some fresh vegetables . Along with that i bought this manga inji also, and made pickle after going home and clicked it also. Everyone at home loved this simple pickle. A perfect combo with curd rice.

Friday, June 21, 2013

VEPPALAIKATTI | VEPPALAI KATTI RECIPE

Veppalakatti is a very traditional tamil brahmin recipe which i have always seen in a store in my home town, where they sell Applams, vadams and vathals.  My amma always buys from there and if you are wondering from the name what it is, it is a dish made with Lime leaves and used as a pickle kind of side dish for Curd rice. A friend of mine shared this recipe with me recently, when i was telling her that i was left with few lime leaves after trying the Thai green curry.

Veppalai katti 1     
INGREDIENTS:
LIME LEAVES 12-14
RED CHILLI 7-8
OMAM | AJWAIN 1/2 TSP
SALT TO TASTE
ASAFOETIDA 1/4 TSP
LIME JUICE FEW DROPS (OPTIONAL)
veppalaikatti 2
METHOD:
  • Wash and pat dry the lime leaves. Tear the leaf and take out the middle stem.
  • Take it out for all the leaves.
lime leaves Kafir lime leaves
  • Grind this in a mixer along with red chilli, omam, asafoetida and salt.(no need to roast any ingredient)
lime leaves veppalai katti
  • after a day or 2 the color will change to brown. So no need to worry about that.
  • If adding lemon juice add it while grinding. I didn’t add. Store it in the refrigerator and handle with a clean dry spoon always.
veppalai katti 3

Monday, April 1, 2013

KARUVEPPILAI THOKKU | CURRY LEAVES THOKKU

Few days back one of my friend made this karuveppilai thokku and when she visited me on the same day she packed me some karuvepillai thokku and it tasted awesome with plain rice and with Curd Rice too. Also this thokku goes well with dosa and chapathi too. It is perfect long travel too. As usual i noted down the recipe from and tried it on the very next day and it turned out like the same thokku which she has given me. So lets us learn today how to make karuveppilai Thokku.
Check out my curry leaves chutney too.
Karuvepillai Thokku 3
INGREDIENTS: [ YIELDS 1 AND 1/2 CUP]
CURRY LEAVES 2 CUPS (LOOSELY PACKED)
CHANNA DAL 4 TSP
CORIANDER SEEDS 4 TSP
RED CHILLI 8-9
ASAFOETIDA 1/4 TSP
SALT AS NEEDED
TURMERIC POWDER 1/4 TSP
TAMARIND EXTRACT 3/4  CUP
JAGGERY A SMALL PIECE
SESAME OIL 1/4 CUP
Curry leaves thokku 2
METHOD:
  • Wash the curry leaves and pat dry them.
  • In a pan,add channa dal, coriander seeds , red chilli and the curry leaves and roast this till the dal turns brown. roast in a medium low flame without burning it.
Curry leaves thokku curryleaves thokku 2
  • Switch off the flame and add asafoetida and salt.
  • allow this to cool. Make this into fine powder in a mixer.
  • Take thick extract of tamarind water by soaking a small gooseberry size tamarind in hot water.
curry leaves 3 curry leaves 4
  • In a pan add oil and add the tamarind water and add the ground curry leaves powder to this.
  • Add salt,tamarind water and jaggery.
  • Keep the flame low and let this comes to a thokku consistency.(semi thick)
  • Stir it in between.
curry leaves 6
  • This can be stored in the refrigerator for 10 days. always use clean spoon dry spoon.
  • this tastes well with rotis too.
  Karuveppilai Thokku     

Friday, February 8, 2013

GOOSEBERRY PICKLE | NELLIKAI OORUGAI RECIPE

INDIAN PICKLE RECIPES

Pickles are usually a rare one which i make at home. When i was in India, i used to make variety of pickles but after coming here to Singapore i generally make few varieties only and especially the Raw mango pickle, which Varsha loves the most. Few days back, when i met a friend in kids school, she wanted me to post the recipe of Gooseberry pickle (amla Pickle) i promised her that i will post it soon. The very next day another friend of mine happened to go the Indian market and bought me these gooseberries and finally i made the nellikai oorugai (Gooseberry pickle)

When i called up my mom to ask for the recipe, she was busy that time and she told everything in a hurry. So i just followed her method and some how made the gooseberry pickle, and it came out very well. I didn’t get the bright red color of the pickle as the reason being my chilli powder was slightly old and the color was not there and also since i grind the mustard seeds the dark color dominated a little.

Gooseberry pickle 3

Sending this pickle to  Bharathy of Spicy Chilly who is hosting her first event “My Spicy Recipe” with an attractive gift vouchers too from that you can shop online and i love to shop from Flipkart which is my recent addiction too.

Here is the recipe of Gooseberry pickle:

INGREDIENTS:

GOOSEBERRY(BIG) 10
METHI SEEDS (VENDAYAM) 2 TSP
RED CHILLI POWDER 5 TSP
SALT AS NEEDED
ASAFOETIDA 1/2 TSP
MUSTARD SEEDS 1 TSP + 1/2 TSP
SESAME OIL 1/4 CUP

Gooseberry pickle 2

METHOD:

  • Wash the gooseberries and pat dry them. In a wide pan, boil water and add in the gooseberries. Add salt and turmeric powder to this and boil for some time (10 mins) till the gooseberries become soft. [ i didn’t add salt and turmeric and later tasting the pickle i felt i should have added it while boiling – This is to get the salt infused into the gooseberries) Do not over cook, check with a fork to see whether it is soft or not.
gooseberry pickle step 1 gooseberry pickle step 2
  • Drain the water completely and take out the seeds from the gooseberries.Since it is cooked it is easy for you to take it out.

gooseberry step 3

  • Dry roast the mustard seeds and methi seeds. When cool grind this into a powder and keep it aside.
gooseberry pickle step 4 gooseberry pickle step 5
  • In a pan add sesame oil and add the 1/2 tsp of mustard seeds and asafoetida.
  • When it splutters add the ground mustard seeds and methi seed powder.( the powder won’t be very fine as it is small in quantity)
  • Add the red chilli powder ,turmeric powder and salt. Saute in a low flame for few minutes and add in the cooked gooseberries.
pickle step 7 Pickle step 9
  • Mix them nicely for and let it be in the pan for a 5 minutes in a medium low flame.
  • Switch off the flame and allow it to completely cool.
  • Transfer this to an airtight container. Always handle with clean dry spoon.
  • Enjoy with curd rice.         Gooseberry pickle 1 

Note:

  1. Always cook the gooseberries with salt and turmeric powder.
  2. I felt mine was slightly undercooked so you can cook it little extra to get the gooseberries soft in the pickle.
  3. Add sesame oil as mentioned.