Tuesday, December 27, 2016

Filipino fruit salad | Easy dessert recipes

Filipino fruit salad |Buko salad, is similar to the Indian fruit cream recipe. This easy and exotic dessert was introduced to me by my helper Joann, 2 years back. Also the mango float recipe also she only taught me. Most of my guests had tasted this yummy dessert and tried at home too. I made this for the guests who came for my cookery show in London. Everyone was impressed by this surprise dessert and asked me for the recipe. And many guests who tasted this asked me whether i have this recipe of fruit salad in jeyashris kitchen, so finally i have made this one day to make a post . In this recipe i used the tinned fruit cocktail, where as you can replace with fresh fruits like pineapple, pomegranate, grapes, mango and apple. Do not use fruits which are very sour. Also i have used the nata de coco, which i get here in tetra packs in the local Singapore fair price shops. You can chop the tender coconut meat (ilaneer thengai) and add to this. Try out this easy dessert recipe and impress your family and guests. A perfect dessert for potluck parties, where you can make this ahead and keep it in the refrigerator, as it tastes best when chilled.
Macaroni fruit salad

Friday, December 23, 2016

Mutter paneer pulao recipe | Easy lunch box recipes

Mutter paneer pulao | peas paneer pulav is a simple one pot meal, and a quite easy lunch box recipe too. I have given this recipe of Kungumam thozi, youth kitchen. This pulao tasted great and a simple onion raitha paired this pulao very well. If you are looking for easy lunch box recipes, then you should try this . The kids will surely polish off the tiffin box even without leaving a single grain of rice.
Mutter paneer pulao
This is a scheduled post. I will get reply back to your emails and messages shortly. Thanks for your kind understanding.

Wednesday, December 21, 2016

Garlic rasam recipe with coconut milk| Rasam recipes

Poondu rasam with coconut milk

Garlic rasam with coconut milk, an aromatic south Indian rasam recipe, even can be had as a soup. Few weeks back we have my cousins here and  we roamed around the city crazily and had loads of fun with them. As we all are foodies, while talking about rasam, my cousin shared with me this recipe of garlic rasam with coconut milk, which she learnt from her mil. Though i make garlic rasam regularly and also posted the recipe long back, this version sounds so different and interesting. I tried the garlic rasam yesterday and it turned out very well. The rasam accompanied by hot rice and potato curry was totally out of the world. Try this rasam for this cool weather and let me know how it turned out.
Garlic rasam with coconut milk
This is a scheduled post and i will reply to your mails and messages soon.  Thanks for your kind understanding. 

Monday, December 19, 2016

Beans aloo sabzi recipe | Punjabi aloo beans sabzi

Beans aloo sabzi is a popular dry sabzi in punjabi cusine. They make Gajar mutter sabzi, aloo capsicum sabzi too. When i went as a judge for a cookery competition here last month, i happened to met a punjabi lady, who was also in the judging panel. I came to know that she is a wonderful cook. She is very humble and very soft spoken. When i asked her for the recipe of this dry punjabi sabzi, she patiently explained to me the recipe. Thank you pooja for the recipe. I tried it out the next day itself and it turned out very well. Try out this easy punjabi beans aloo subzi as an accompaniment for roti| rice. You can make a dal also as the sabzi is a dry one.

Beans aloo subzi
This is a scheduled post and i will reply back to your queries once i am back from my vacation. Thanks for your kind understanding. 

Friday, December 16, 2016

Peanut chutney with tomato | Chutney recipes

Learn how to make peanut chuntey with tomato (no coconut) 

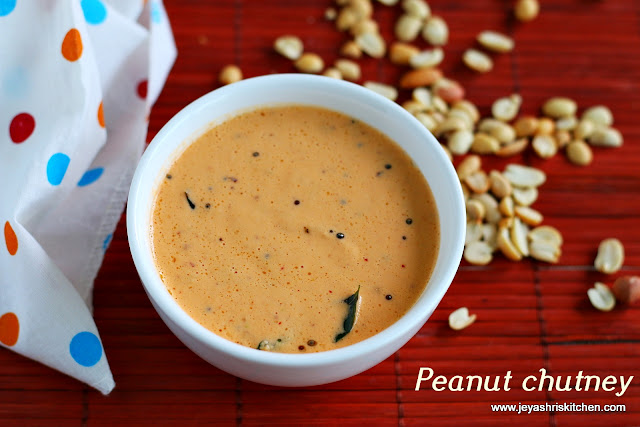
Peanut chutney | Groundnut chutney| verkadalai chutney, is a simple south Indian chutney made as an accompaniment for idli|dosa. I have already posted peanut chutney recipe, but this one i recently tried as i had lots of roasted unstalted peanuts which my mom sent for me from India. I have a asked that to make verkadalai urundai as the one we get here is very big and size. I have a pack of them left and i tried this easy peanut chutney recipe out of them. It tasted very well and we had this with whole wheat grain dosai. You can make this for idli or any variety of dosa too. If you have the roasted peanuts in hand, this chutney can be made in 20 minutes.
peanut chutney
This is a scheduled post as i am on vacation right now. Will reply to your email queries shortly. Thanks for your kind understanding.

Friday, December 9, 2016

Achu murukku recipe | Eggless rose cookies

Achu murukku| Achappam| rose cookies , is the most requested recipe from my readers and though i tried this last year but i can't confidently say that i got it perfect. So i didn't post. But this year i wanted to post the achu murukku recipe for diwali itself but still i was not fully confident as it turned out well for the first 4-5 batches and then i couldn't get it perfect. Finally after making few attempts, i cracked the perfect recipe of making eggless achu murukku. I thank my friend Erlean who always happily gave her mould whenever i asked for it. Try out this achu murukku recipe and let me know it turned out.
achu murukku

Wednesday, December 7, 2016

Paneer Tikka Masala | Side dish for roti

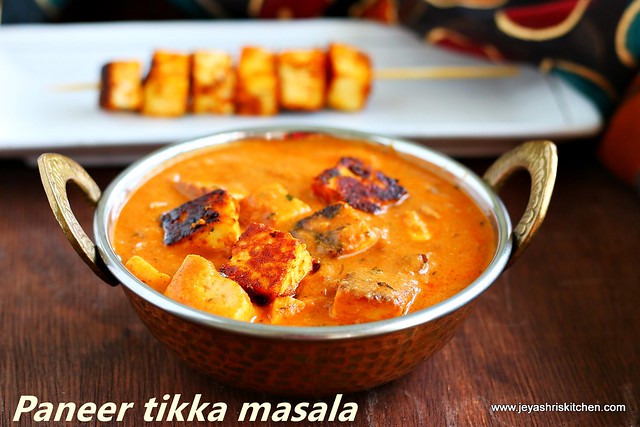
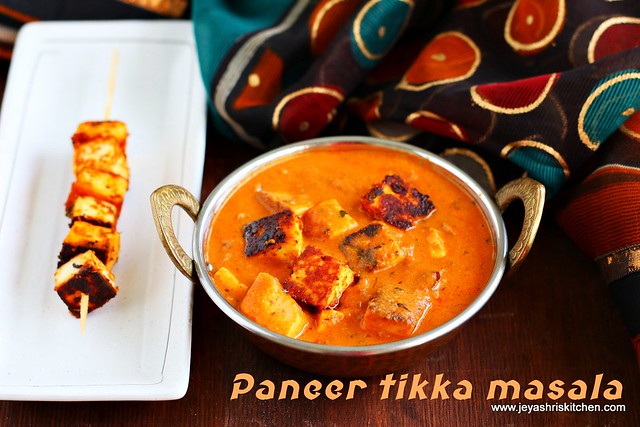
Paneer tikka masala, is a popular paneer recipe, which i saw for the first time in Sanjeev kapoor's recipe book long back. I tried my own version few months back, when i have my friend's family for dinner, the paneer tikka masala was a super hit with kulcha. I have a small pack of paneer left in the freezer and wanted to finish off before i go for my vacation. So made this paneer curry few days back and everyone at home loved it. I have already posted paneer tikka dry recipe and hariyalai paneer tikka recipe, stove top version. The tandoori barbeque flavour can be easily be infused in the paneer masala using the charcoal method which i have used in Dabba style dal. Try this recipe and let me know how it turned out.
paneer tikka masala

 Check out my other popular paneer based gravies


Paneer tikka masala recipe

  Preparation Time : 15 mins + 30 mins marination | Cooking Time : 40 Mins |Serves: 5-6

     For marination
Paneer cubes   2 cups
Red chili powder  1 tsp
Coriander powder |dhaniya  1/2 tsp
Cumin powder | jeera 1/2 tsp
Tandoori masala  3/4 tsp
Thick yogurt   2 tblsp
Salt  as needed
Kasoori methi  2 pinches
 
   For the gravy
Onion   4
Garlic  5 pods
Cashew  10
Oil   1 tblsp
Tomato puree 1/2 cup
Red chili powder  1 tsp
Coriander powder  1/2 tsp
Cumin powder   1/2 tsp
Garam masala   1 tsp
Salt  as needed


Paneer tikka masala
Method:
  • Bring the paneer to room temperature.
  • In a wide bowl add the paneer, hung curd, kasoori methi, red chili powder, tandoori masala (or garam masala), salt, cumin powder and coriander powder.
  • Mix this well and ensure the masalas are evenly coated. 
  • Marinate this paneer for 30 minutes. You can marinate for 2-3 hours too. 
  • While marinating keep this inside the refrigerator. 
Lets make the gravy for the paneer tikka masala, while the paneer is getting marinated.
  • Chop 2 onions finely. Take out the skin of the garlic. 
  • In a pan add 1 tblsp of oil and add in the onions, garlic and cashew nuts. 
  • Cook in a medium flame till the onions gets nicely browned. Be careful not to burn this. 
  • Allow this to cool completely and grind this into a smooth paste. 
  • Keep this aside.
  • In a pan add 2 tsp of oil and add in the chopped onions (2 onions)
  • Cook till they turn translucent. 
  • Add in the ground paste to this. Add in the tomato puree to this.
  • Add the red chili powder, jeera powder, coriander powder, garam masala powder, salt and mix well.
  • Add 1/2 cup - 3/4 cup of water to adjust the consistency. Since we have added cashew nuts and also the addition of paneer in the last will make the gravy thicken. So add water accordingly.
  • Boil this for few minutes in a low flame and stir this in between.
  • Switch off the flame. Or you can either do the paneer tikka side by side.
  • Grease a tawa and cook the marinated paneer. Alternatively you can do it in the oven. But i have no experience on cooking paneer tikka in oven.
  • Cook this on a medium flame on all sides till you get them nicely browned.
  • Add the cooked paneer tikka to the masala and add the kasoori methi to the gravy.
  • Bring this to a boil. Check for the consistency.
 
  • Add the fresh cream or milk (room temperature) to the gravy and mix well.
  • If you have charcoal, you can go ahead by heating the charcoal on open flame and keep it in a small bowl and put a tsp of butter on it and immediately close the pan with a lid.
  • Keep the flame very small and cook for 5 minutes. Switch off.
  • If you do not have charcoal, just switch off the flame after adding the milk or cream. 
  • If using charcoal, i highly recommend to use it , just before serving the gravy. In this way it retains the smoky flavour and gives nice taste of dabha style paneer tikka masala.
paneer tikka masala
Notes:
  1. You can buy big block of paneer and cut them into cubes and do the paneer tikka masala.
  2. I used the ready made paneer cubes. 
  3. Adding tandoori masala gives a nice bbq tandoori flavour to the paneer. If not available add the garam masala. 
  4. You can add pan fried capsicum and onions also or you can marinate them along with the paneer and cook them on tawa.


Monday, December 5, 2016

Thumbprint cookies recipes | Eggless cookies recipes

Thumbprint cookies, if i remember well, this is the first one i baked when i got my new oven 7 years back. The simple easy cookie me and my daughter baked again for the last working day of this year, before their school holidays. I used my puppy faced cookies for the base and made these thumbprint cookies. The eggless cookies turned out so beautiful and everyone in the class loved it very much. As the Christmas season is nearing, you can bake this easy eggless thumbprint cookies at home and enjoy the holidays. We are off for vacation to Chennai in a few days, so i will be scheduling few simple posts during my vacation. Check out my


Thumbprint cookies

  Preparation Time : 20 mins | Baking Time : 10-12 Mins |Makes: 18-20 cookies

     All purpose flour | plain flour | maida   1 cup
     Butter    1/2 cup
     Vanilla essence   1/4 tsp
     Sugar  1/4 cup
     Jam   1- 2 tbslp approx 


Thumbprint cookies
Method:
  • Soften the butter and powder the sugar. Add both together in a bowl and mix this nicely.
  • Add vanilla essence to this. 
  • Add the flour to this now and knead this into a pliable dough. If you feel that the dough is bit dry add 1-2 tblsp of milk to this and knead well without any cracks.
  • Make them into small lemon sized balls and slightly flatten it. 
  • Microwave the jam for 45 seconds and keep it ready. 
  • If you do not have a microwave you can keep the jam in a bowl of hot water.  
  • I used kissan fruit jam. You can any jam of your choice.
  • Make a dent in the center using your thumb and fill the dent with jam. Do not add too much jam, else it will over flow and spoil the appearance of the cookie when it is baked.
  • Alternatively you can use a cookie press to make shapes. 
  • Bake the cookies in an oven for 10- 12 minutes at 160 degree Celsius. 
  • Allow this to completely cool. The cookies won't change colour. 
  • Thumb print cookies are ready . Cool this completely in a wire rack and store the jam cookies in an airtight container.
Eggless cookies
Notes:
  1. If you feel the cookies bit soft when you take out from the oven, just allow that to cool completely and see, if it is still soft then bake for 2-3 minutes more.
  2. Do not add more jam to the dent, else it will overflow and splash all over the cookies while baking and spoil the look of the cookies.
  3. You can follow my eggless custard powder cookies recipe also to make this thumbprint cookies.
  4. Instead of jam you can add nutella too. 


Friday, December 2, 2016

Nel pori urundai recipe | Karthigai pori urundai recipe with video

Nel pori urundai recipe with video

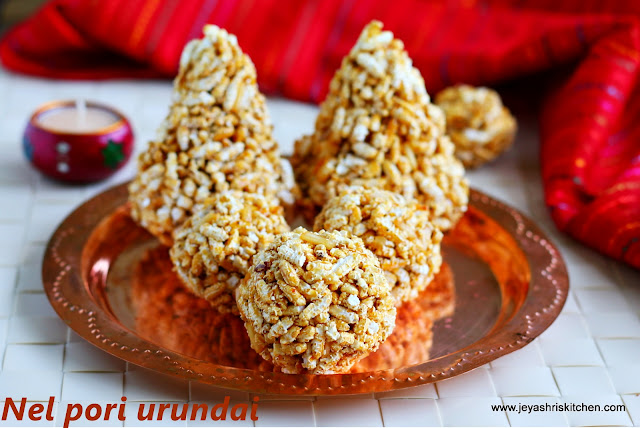
Nel pori urundai is the traditional recipe we make for Karthigai deepam. Karthigai deepam is celebrated in Tamilnadu and we lit lamps in the houses. Karthigai deepam 2016 is on Dec 12. We make pori urundai and in the traditional brahmin houses,we make paruppu thengai first and then proceed with making of balls. Some houses they do not make urundais, they just mix the pori with jaggery syrup and offer as neivedhyam. Recently in my skype class i took the session on making of pori urundai using nel pori and paruppu thengai too. I have already posted pori urundai recipe but that was made with the puffed rice, which we use for bhel puri. We also make aval pori urundai for karthigai deepam. For all types of pori, we use the same proportion and method, as mentioned in the recipe below. Check out my other karthigai deepam recipes.  
nel pori urundai


Wednesday, November 30, 2016

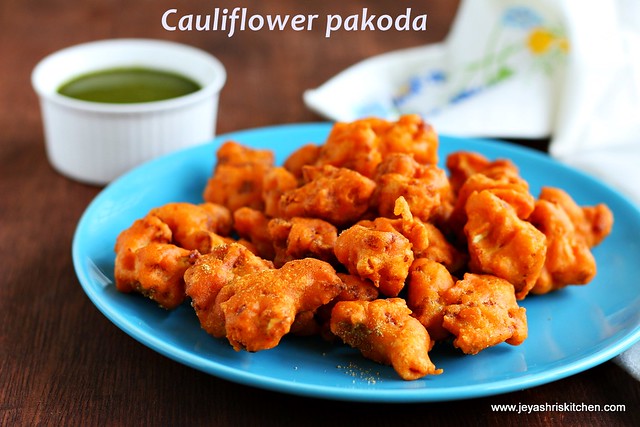
Cauliflower pakoda recipe | Cauliflower pakora

Cauliflower pakoda recipe with video
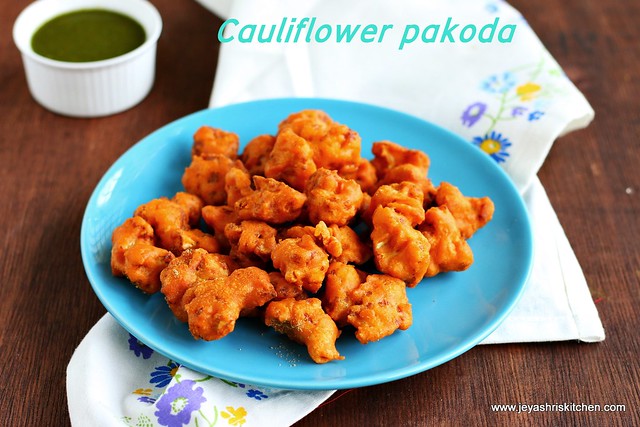
Cauliflower pakoda | Gobi pakora is a easy and tasty tea time snack made with cauliflower. I have already posted gobi 65, veg pakora recipe, but this one is more of South Indian style cauliflower pakoda. I just sprinkled little chaat masala in the last to enhance the flavour. You can serve this as a tea time snack or serve as an accompaniment for a southIindian meal. We used to have this cauliflower pakoda with curd rice too. Try out this crunchy cauliflower pakora and let me know how it turned out.
Cauliflower - pakoda

Cauliflower pakoda recipe

  Preparation Time : 15 mins | Cooking Time : 35 Mins |Serves: 3

     Cauliflower florets   2 cups
     Besan | Kadalai maavu  1/2 cup
     Rice flour   1/4 cup
     Red chili powder   1 tsp
     Salt   as needed
     Baking soda   a pinch
     Oil   for deep frying
     Chaat masala   2-3 pinches (optional)
                                         Video of how to make cauliflower pakoda


Cauliflower pakoda
Method:
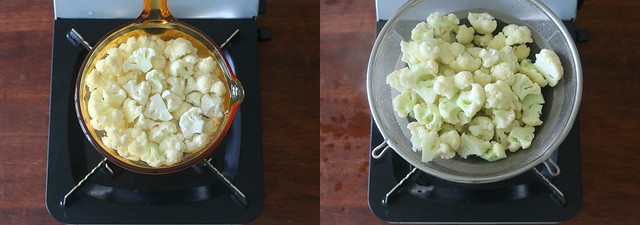
  • Wash the cauliflower florets and keep it aside. 
  • In a pan add water and add little salt. Bring it to a boil. 
  • Add the cauliflower florets to this and let this stay in hot water for a minute.
  • Drain the water completely and keep it aside. 
cauliflower pakoda
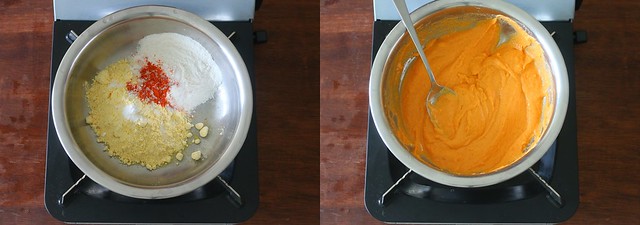
  • In a bowl add the besan, rice flour, red chili powder, baking soda and salt. 
  • Add little water and make a thick paste out of this without any lumps. 
  • The consistency should be little thicker than an idli batter. Beat the mixture with a spoon nicely to get a nice airy batter. 
cauliflower pakoda 2
  • If you add more water by mistake add 1-2 tblsp of rice flour to bring it to the right consistency.
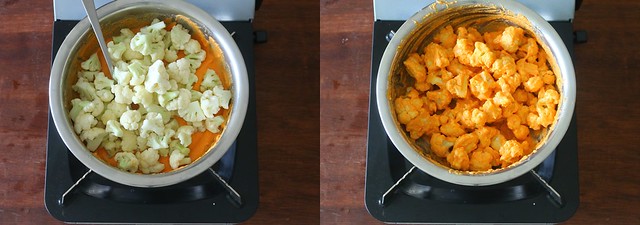
  • Add the cauliflower florets to this and mix well and let all the florets get coated with the batter evenly.
cauliflower pakoda 3 
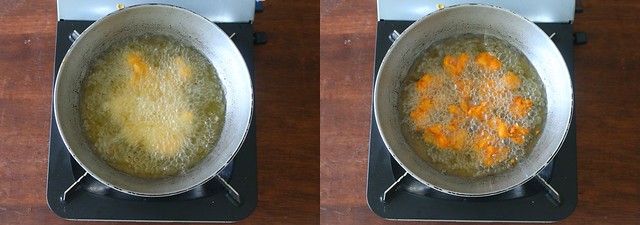
  • Heat the oil for deep frying. When it is hot, bring the oil to medium flame and put the cauliflower florets in oil and fry in batches.
  • Let this cook and gets golden brown on the outer side. 
cauliflower pakoda 4
  • Once it is done take out from oil drain in kitchen towel. 
  • When it is hot sprinkle some chaat masala on this and serve hot. Adding chaat masala is optional, you can skip this too.
cauliflower pakoda
Notes:
  1. You can add ginger garlic paste to the batter.
  2. Ajwain | omam can also be added to the batter. 
  3. Ensure that the batter should not be too thin, else the batter will not get even coating and also will absorb oil.
  4. Keep the cauliflower florets ready and mix the batter just before frying. 
  5. I made the mixture on one shot and kept one batch without frying inside the refrigerator and fried after 3 hours. It turned out pretty well. 
  6. Do not fry in low flame. It will make the pakoras soggy. 
  7. Finely chopped coriander leaves can be added to the batter to give a nice flavour. 
  8. Enjoy the cauliflower pakoras | cauliflower pakodas with ginger tea or filter coffee.