Monday, October 8, 2012

ITALIAN BREAD SOUP RECIPE

Last week when we went to buy a laptop which we were planning for a very long time, we finished our shopping and after that we wanted to install some additional things to it and the shopkeeper told that it will take one hour and as the time was around 7 pm kids started feeling hungry and we went to a nearby cafe. Unfortunately nothing was there for vegetarians. Finally we thought we will have some juice but the choice which the kiddos opted for was not there. Then finally they told they have a choice of a vegetarian soup and we ordered one and told the waiter that we will order one more if the kids like the soup. We all loved the soup and it was quite filling too. While we were having the soup the chef visited the dining area(it was a very small cafe). When he asked the feed back about the soup i casually asked him the recipe and he immediately told the recipe of the bread soup in detail and i made this 2 days back. My kids enjoyed and the taste was so close to the soup which we tasted in the cafe.
Also check out my

Italian bread soup2
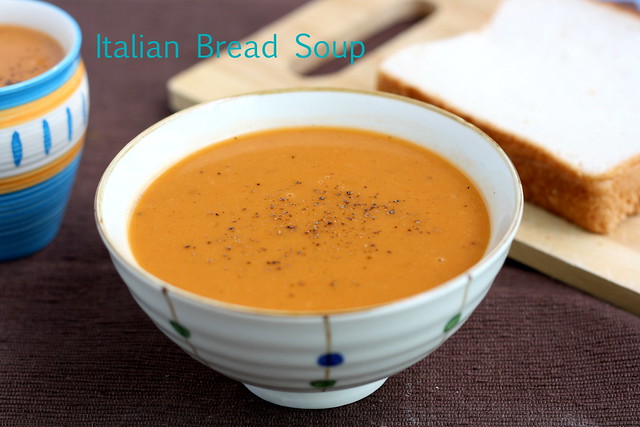
This soup is made with the bread crust(sides of the bread) which we usually discard. So whenever you cut the edges of the bread keep it in the freezer and try out this soup.
INGREDIENTS: SERVES 2-3
BREAD CRUST(SIDE PORTION OF THE BREAD) FROM 4 SLICES OF BREAD
PASTA SAUCE 3-4 TBLSP
ONION 1
GARLIC 3-4
BUTTER 1/2 TSP
OREGANO A PINCH
BLACK PEPPER POWDER 1/2 TSP
WATER 2-3 CUPS
SALT AS NEEDED
Italian bread soup 3

METHOD:
  • Take out the the edges of the bread and chop them roughly.
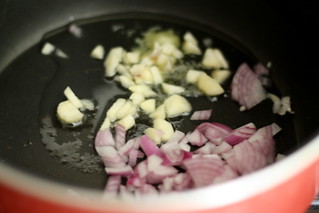
  • Chop the onions and garlic finely.
  • In a deep pan, add butter and add the chopped and saute them till the onions becomes translucent.
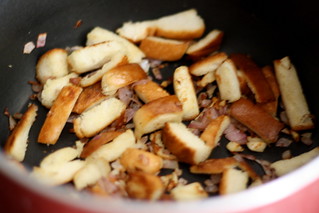
  • Add the bread crust and saute till it emits a nice aroma. Do it in a lower flame.
step 1 step 3
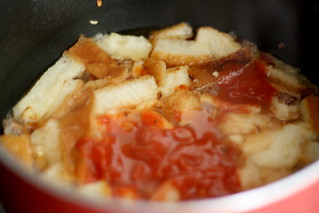
  • When it is done, add 2 cups of water,tomato based pasta sauce and cover the pan and cook till the bread becomes tender and the flavours are infused into it.
  • Let this cook for 7-9 minutes.
step 5 step 6
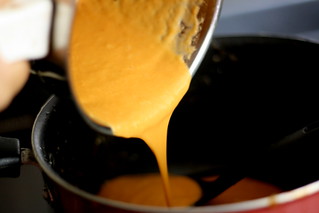
  • Allow this to cool and blend this smoothly in a blender.
  • Add the blended soup to the pan and bring it to a nice boil.
  • Add oregano ,pepper powder and salt to this.
step 7 step 9
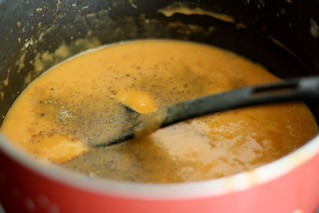
  • Add water to reach the right consistency. If you want to have a creamy soup add 1/2 cup of full cream milk in the last.
  • Serve hot.
Italian bread soup

Friday, October 5, 2012

PASIPARRUPU SUNDAL RECIPE| NAVARATRI SUNDAL RECIPES

    Navaratri is nearing and is starting from next week , i wanted to post some sundal varieties in my space which will be helpful for all my readers. So i will be posting some navaratri recipes in the following weeks. It has been a long time since i made this pasiparrupu sundal and i remember my grandma making  this one not only  during navaratri evenings ,but also on regular days and we used to enjoy this healthy  evening snack.
Also check out my


pasiparuppu sundal

INGREDIENTS:
YELLOW MOONG DAL| PASIPARUPPU 1/4 CUP
TURMERIC POWDER A PINCH
SALT AS NEEDED
GREEN CHILLI 1
LEMON JUICE FEW DROPS
GINGER (GRATED) 1/4 TSP
COCONUT(SCRAPPED) 2-3 TBLSP
OIL 1/4 TSP
MUSTARD SEEDS 1/8 TSP
COCONUT OIL 1-2 DROPS(OPTIONAL)
CURRY LEAVES FEW
IMG_9024

METHOD:
  • In a heavy bottomed pan add the moong dal and add 1 and 1/2 cup of water along with turmeric powder and salt.
IMG_9002 IMG_9003
  • Let this cook in a medium flame for 10 to 12 minutes. Stir in between and be careful not to get it burnt.
  • Do not over cook, the moong dal should be whole and at the same time should be soft too. It should not be mushy.
IMG_9006
  • Drain the water and keep the cooked moong dal separately.
  • In a pan, add oil and temper with mustard seeds and add in the chopped green chillies and ginger.
  • When it is done add the cooked pasiparuppu(moongdal) and saute for a minute.
IMG_9010 IMG_9011
  • Add scrapped coconut and lemon juice. Mix well. Add few drops of coconut oil (if using) and mix well. Garnish with curry leaves. I didn’t add as i don’t have curry leaves.Sad smile

IMG_9044
NOTE:
  • Instead of adding green chilli you can add red chillies too.
  • I feel addition of asafoetida(perungayam) will suppress the flavour of the ginger , green chilli and lemon juice flavour. 
  • If you wish you can add it to the pasi paruppu sundal.

Wednesday, October 3, 2012

SOYA CHUNKS BIRYANI | SOYA CHUNKS RECIPES

   soya-chunks-biryani
Biryani is a very popular and rich one pot meal. I am posting the recipe of soya chunks biryani  made in pressure cooker, though it is not the authentic way of making biryani, but i am sure it will taste awesome and  easy one to make even on a busy weekday mornings too.
Before going into the post i wanted to mention to all my readers that i have a Facebook Fanpage for Jeyashri’s Kitchen and you can get all the updates by clicking the Like button over there. And for I am clarifying the doubt that i am not writing recipes in Facebook  i have a website  and i have a collection of 1200+ recipes , i have linked my posts to get published in Facebook. For those who are not aware of it, just click HERE.
Over to the recipe of Protein Rich Soya Chunks Biryani:
Also check out my

Monday, October 1, 2012

INSTANT TIFFIN SAMBAR RECIPE| SIDE DISH FOR IDLI|DOSA

SAMBAR WITHOUT DAL

  I have already posted the recipe of Tiffin sambar , but  few weeks ago when i went for an outing with my friends the topic of instant sambar came. Suddenly i remembered that i have tried an instant sambar long back from Rohini’s space. But since i forgot that recipe i searched in her blog again and made the instant tiffin sambar again and enjoyed with idlis . After a break rohini has started blogging again. Follow Jeyashri's Kitchen on Facebook to recipe updates.
Also check out my

instant tiffin sambar
CARROT 1/2
TOMATO 2
SHALLOTS(SMALL ONIONS) 4-5
TAMARIND EXTRACT 3 TBLSP
CORIANDER SEEDS 1 TBLSP
RED CHILLI 2
POTTUKADALAI | CHUTNEY DAL|ROASTED GRAM 2 TBLSP
OIL 2 TSP
MUSTARD SEEDS 1/4 TSP
WATER AS NEEDED
SALT AS NEEDED
TURMERIC POWDER 1/4 TSP
CURRY LEAVES | CORIANDER LEAVES FEW
INSTANT SAMBAR

METHOD:
  • Chop the tomatoes and carrots and  peel the skin of the shallots.
IMG_8667
  • In a pan, add a tsp of oil and roast the coriander seeds(dhania),red chilli and 2-3 shallots.
  • When it turns brown add half portion  of the chopped tomatoes and saute in a medium flame till the tomatoes becomes soft.
IMG_8664 IMG_8671
  • Allow it to cool and and grind it into a smooth paste adding the pottukadalai (roasted gram)to it.
IMG_8666 IMG_8676
  • In a pan, add oil and throw in the mustard seeds and when it splutters add in the remaining shallots and when they are slightly brown add the remaining half of the chopped tomatoes.
  • Now add the carrots and saute for a minute and add the tamarind extract and add 2 cups of water. Add salt and turmeric powder.
IMG_8673 IMG_8675
  • Allow it to boil for few minutes till the carrot becomes soft.
  • Add the ground spice mix to it and before adding the ground masala dilute it with 1/2 cup of water.
IMG_8681
  • Allow this to boil and garnish with curry leaves and coriander leaves.
  • If you find the sambar is thick just add water to dilute it and bring it to a boil.
  • Serve it hot with Idli | dosa | pongal.
instant tiffin sambar

Friday, September 28, 2012

PARRUPU URUNDAI KUZHAMBHU | URUNDAI KULAMBHU

Parrupu Urundai Kuzhambhu, my mom makes during our childhood days, but i never used to eat it and she makes rasam for me but my sister used to love it like anything. Even after marriage in my in laws place they never used to make it but i remember once my mil made this with morkuzhambhu. When i wanted to make this last week, I asked my mom for the recipe and i tried it and somehow i enjoyed it and told my mom that i liked the paruppu urundai kulambhu very much.
Check out my

urundai kuzhambhu

INGREDIENTS:
FOR URUNDAIS:(YIELDS 10 SMALL BALLS)
TOOR DHAL 1/4 CUP
CHANNA DAL 1 TBLSP
RED CHILLI 2
SHALLOTS(SMALL ONION) 6-7(OPTIONAL)
SALT AS NEEDED
ASFOETIDA A GENEROUS PINCH
FOR THE GRAVY
TAMARIND EXTRACT(THIN EXTRACT) 3 CUPS
SAMBAR POWDER 2 TSP
SALT AS NEEDED
TURMERIC POWDER 1/4 TSP
ASAFOETIDA A PINCH
SESAME OIL 1 TBLSP
MUSTARD SEEDS 1/4 TSP
CURRY LEAVES FEW
urundai kuzhambhu

Method:
  • Wash and soak the dals together for 45 minutes.
  • Drain the water completely and grind it into a slightly coarse paste by adding red chilli , salt and asafoetida to this.
  • Peel the skin of the shallots (if using)and finely chop them and mix it to the ground dal mix.
IMG_8448 IMG_8456
  • Grease your hands and make small tight balls.
  • Grease the idli plate and arrange the urundais on it and steam it for 12 to 15 minutes on medium flame.
  • Insert a tooth pick to check out whether it is done.
IMG_8461 IMG_8465
  • In a pan, add sesame oil and throw in the mustard seeds and when it splutters add the tamarind extract and add the turmeric powder, salt,sambar powder ,curry leaves and asafoetida.
IMG_8463
  • When it starts boiling simmer the flame and add the steamed paruppu urundais carefully to the boiling gravy one by one.
IMG_8466 IMG_8467
  • Let this boil till it reaches a kulambhu (gravy) consistency.
  • It should be slightly thicker than the sambar.
IMG_8469-001
  • Serve with hot rice. Normally we mix  the gravy with hot rice and keep he urundais as accompaniment.
  • We had with avarakkai(broad beans) curry and Vazhakkai chips.

urundai kuzhambhu
Note:
  • Adding onions is totally optional. My mom told adding onions makes it soft.
  • Some people add fennel seeds while grinding ,but since i don’t like it much i didn’t add.
  • You  also add a tsp of cumin seed while grinding.
  • Some people may add coconut to the gravy, if you want to add just grind 2-3 tblsp of coconut with little water and add it to the gravy in the last.
  • Always ensure that the balls should be tight and while grinding do not add water. If it is loose they may tend to break after putting it into the gravy.

Wednesday, September 26, 2012

HOW TO MAKE SOFT IDLIS | IDLI BATTER RECIPE


IDLI RECIPE


 Idli is an extremely popular breakfast recipe made in almost every South Indian household,  a  soft, fluffy rice cakes made by steaming a fermented rice and lentil batter.. Idli is now recognized worldwide as a healthy and nutritious breakfast option. I have been wanting to post the recipe – how to make soft idlis for a long time now. However, after coming to Singapore I stopped following the traditional method of grinding idli batter as I was not very sure about the quality of urad dal
available here. Back home in India, I would grind a large batch of idli batter every week and we would all savour deliciously spongy idlis. We used to bring back packets of Udad dal from India but they would last me only a few months. I tried adding a handful of poha (puffed rice) along with rice and this gave me soft idlis. But, the idea of grinding udad dal and idli rice separately was slightly time consuming and did not appeal to me. Hence, I started grinding urad dal, idli rice and poha together smoothly. I must say I am extremely satisfied with my method of making idli batter as this never fails to result in super soft idlis. After repeated requests from many of my friends, I am posting the recipe of Idli batter. This method is very convenient for people who like to grind the batter in smaller quantities. Do scroll down to the end of the recipe for the tips to get soft idlis. For bachelors and people who do not have a grinder, I have also posted the recipe of idli/dosa batter in mixie and in case you do not have idli rice, you can check for the recipe of  idli using idli rava

Idli

Monday, September 24, 2012

VAZHAKKAI CHIPS RECIPE| HOME MADE RAW BANANA CHIPS

   Vazhakkai | Raw banana chips is a rare one which i make at home, though my grandmother makes a super crispy chips often. One day i had a sudden craving for this chips and i decided to make it out and asked my mom for the exact procedure of making it(though i know roughly). The raw banana chips came out super crispy and yum and we enjoyed with hot rice and Paruppu urundai kuzhambhu for a weekend lunch. Will be posting the recipe for parrupu urundai kuzhambhu in my next post.
Also check out my


raw banana chips
INGREDIENTS:
RAW BANANA | VAZHAKKAI 2
OIL TO DEEP FRY
SALT AS NEEDED
BLACK PEPPER POWDER 1/4 TSP
RED CHILLI POWDER 1/8 TSP
PLANTAIN CHIPS
METHOD:


  • Peel the skin of the  raw bananas and slice them using a slicer (mandoline slicer)and immerse it in salt water for 10 minutes.
IMG_7692
  • After 10 minutes, take out the slices and pat dry in a kitchen towel.
  • On the other hand heat the oil for deep frying.
IMG_7693 IMG_7694
  • When the oil is hot, carefully put in the dried and sliced raw bananas.
  • Fry it in batches. Do not put too much at a time. Also carefully put them and ensure everyone is separate . If the raw banana slices are together then it will get cooked evenly and will become soggy.
  • When the sizzle sound of the oil subsides, take them out and drain it in a kitchen towel.
IMG_7695 IMG_7696
  • Repeat this for the rest of the slices.
  • Transfer it to a wide airtight container. Add pepper powder and chilli powder. Do not add salt as we added while immersing them in water.
  • Shake vigorously for even mixing of spices.
  • Enjoy crispy Vazhakkai chips with Rice and sambar or with tea | coffee.
vazhakkai chips
Note:
  • Just before frying take out the sliced raw bananas from water and pat dry. Else the color will become dull.
  • After frying and draining the excess oil in the kitchen towel, a minute later transfer it to a air tight container. Repeat this for all the batches . If the chips stays outside till the entire batch gets over it will loose its crispiness.
  • For a healthy version you can bake it instead of frying.
  • In my in laws place the cook mami will take out the skin of the vazhakkai ( as we do for ripe banana) and directly slice them in the oil. though i have seen that I never tried as i don't think i can bear the heat!!