Wednesday, February 13, 2013

SEMIYA BIRYANI | VERMICELLI BIRYANI RECIPE

EASY LUNCH BOX RECIPE – TRIED FROM RAK’S KITCHEN.

This is the first time i am trying the recipe of Semiya or vermicelli biryani. Usually i make the some rice varieties for kids lunch box and for a change i tried this Semiya biryani from Rak's Kitchen . Though it turned out quite well and i planned to make this once in a week for lunch box.
  If you wonder, that i am not using any fancy plastic box for kids lunch box, no i won’t use any plastic and use only stainless steel lunch box as even a high quality plastic is not good as it will bring many health problems in long run. Even the storage boxes i use in the kitchen are stainless steel only. So try to avoid using plastic boxes as much as you can.
Semiya biryani 2
  
INGREDIENTS: (SERVES 2) FOR ORIGINAL RECIPE, CLICK HERE.
I slightly altered the recipe to suit my taste.
ROASTED VERMICELLI 1/2 CUP
THIN COCONUT MILK 1/2 CUP
MIXED VEGETABLES 1/4 CUP
ONION 1
MINT LEAVES 5-6
GARLIC 4-5 FLAKES
FENNEL SEEDS 1/4 TSP
CARDAMOM 1
GREEN CHILLI 1
SALT AS NEEDED
OIL | GHEE 1-2 TBLSP
Semiya Biryani 1
METHOD:
  • Grind the mint leaves, garlic flakes,fennel seeds, green chilli and cardamom into a fine paste adding little water to it.
  • Slice the onions and chop the veggies finely. I used carrot,beans and green peas.
semiya biryani step 1 semiya biryani step 2
  • In a pan, add oil | ghee and add the cumin seeds and the   onions. Saute till the onions turn brown.
  • Mix 1 tblsp of coconut cream powder in 1/4 cup of water. If using fresh coconut milk, just use the thin milk.
semiya biryani step 4 semiya biryani step 3
  •    Add the ground masala paste and saute well, till the raw smell goes off.
  • Add the veggies and saute well for 3-5 minutes in a medium flame, till the veggies gets half cooked. Add the coconut milk and let it boil in a low flame.
semiya biryani step 5 semiya biryani step 6
  • Add salt and add the roasted vermicelli. I used the roasted one, if using the non roasted one, roast the semiya well ,else the biryani will be sticky.
  • Cover and cook in a very low flame till the moisture gets absorbed.
semiya biryani step 7 semiya biryani step9
  •   Enjoy with any raita of your choice.
    semiya biryani 3
Sending this to Tried and tasted event hosted by Sowmya of Nivedhanam.
Note:
  1. Instead of grinding the mint leaves you can finely chop them and add too.
  2. Do not add too much of water or coconut milk, it will make the biryani sticky.
  3. If using plain vermicelli, roast it nicely in a low flame, else the biryani will be sticky

Monday, February 11, 2013

PUDINA CHUTNEY| MINT CHUTNEY RECIPE|SIDE DISH FOR IDLI /DOSA

NO ONION NO GARLIC RECIPE

Though making of Idli | dosa is an easyone for breakfast or dinner , making a side dish for idli / dosa is always a task for me and most of time i end up making Onion tomato chutney and coconut chutney( recipe coming soon)  and sometimes will make Tiffin Sambar too. My daughte Varsha loves to try different varieties of chutney for idli | dosa and so i tried pudina chutney last week as i had a big bunch of mint leaves after my visit to the Indian market here.

We had this pudina chutney with dosa and the recipe is quite simple and easy to make too.

mint chutney 2

INGREDIENTS:

MINT LEAVES 1 CUP (TIGHTLY PACKED)
CHANNA DAL 1 TBLSP
RED CHILLI 5-6
TOMATO 1
ASAFOETIDA A PINCH
COCONUT 1-2 TBLSP
OIL 1 TSP + 1/2 TSP
MUSTARD SEEDS 1/4 TSP
SALT AS NEEDED
CURRY LEAVES FEW

mint chutney 1

METHOD:

  • In a pan, add oil and add the channa dal , red chilli and asafoetida. When the dal turns golden brown, add the roughly chopped tomato.
  • Wash the mint leaves and keep it aside.
Mint chutney step 1 mint chutney step 2
  • Now keep the flame in medium low and saute till the tomatoes turns soft.
  • Add the mint leaves and add the salt. Saute for a minute and switch off the flame.
mint chutney step 3 mint chutney step 4
  • Add the coconut and allow it to cool. When it is cool, grind this into a smooth paste in a mixer.
  • Temper with mustard seeds and curry leaves.
mint chutney step 5 mint chutney step 6
  • Serve with Idli | dosa. I had some left over chutney which i had with biryani the next day and it tasted quite well.
mint chutney 3

NOTE:

  1. Always ensure that the channa dal is roasted very well, as after adding the rest of the ingredients it won’t get roasted.
  2. Do not over cook or saute the mint leaves. It may give a bitter taste.

Friday, February 8, 2013

GOOSEBERRY PICKLE | NELLIKAI OORUGAI RECIPE

INDIAN PICKLE RECIPES

Pickles are usually a rare one which i make at home. When i was in India, i used to make variety of pickles but after coming here to Singapore i generally make few varieties only and especially the Raw mango pickle, which Varsha loves the most. Few days back, when i met a friend in kids school, she wanted me to post the recipe of Gooseberry pickle (amla Pickle) i promised her that i will post it soon. The very next day another friend of mine happened to go the Indian market and bought me these gooseberries and finally i made the nellikai oorugai (Gooseberry pickle)

When i called up my mom to ask for the recipe, she was busy that time and she told everything in a hurry. So i just followed her method and some how made the gooseberry pickle, and it came out very well. I didn’t get the bright red color of the pickle as the reason being my chilli powder was slightly old and the color was not there and also since i grind the mustard seeds the dark color dominated a little.

Gooseberry pickle 3

Sending this pickle to  Bharathy of Spicy Chilly who is hosting her first event “My Spicy Recipe” with an attractive gift vouchers too from that you can shop online and i love to shop from Flipkart which is my recent addiction too.

Here is the recipe of Gooseberry pickle:

INGREDIENTS:

GOOSEBERRY(BIG) 10
METHI SEEDS (VENDAYAM) 2 TSP
RED CHILLI POWDER 5 TSP
SALT AS NEEDED
ASAFOETIDA 1/2 TSP
MUSTARD SEEDS 1 TSP + 1/2 TSP
SESAME OIL 1/4 CUP

Gooseberry pickle 2

METHOD:

  • Wash the gooseberries and pat dry them. In a wide pan, boil water and add in the gooseberries. Add salt and turmeric powder to this and boil for some time (10 mins) till the gooseberries become soft. [ i didn’t add salt and turmeric and later tasting the pickle i felt i should have added it while boiling – This is to get the salt infused into the gooseberries) Do not over cook, check with a fork to see whether it is soft or not.
gooseberry pickle step 1 gooseberry pickle step 2
  • Drain the water completely and take out the seeds from the gooseberries.Since it is cooked it is easy for you to take it out.

gooseberry step 3

  • Dry roast the mustard seeds and methi seeds. When cool grind this into a powder and keep it aside.
gooseberry pickle step 4 gooseberry pickle step 5
  • In a pan add sesame oil and add the 1/2 tsp of mustard seeds and asafoetida.
  • When it splutters add the ground mustard seeds and methi seed powder.( the powder won’t be very fine as it is small in quantity)
  • Add the red chilli powder ,turmeric powder and salt. Saute in a low flame for few minutes and add in the cooked gooseberries.
pickle step 7 Pickle step 9
  • Mix them nicely for and let it be in the pan for a 5 minutes in a medium low flame.
  • Switch off the flame and allow it to completely cool.
  • Transfer this to an airtight container. Always handle with clean dry spoon.
  • Enjoy with curd rice.         Gooseberry pickle 1 

Note:

  1. Always cook the gooseberries with salt and turmeric powder.
  2. I felt mine was slightly undercooked so you can cook it little extra to get the gooseberries soft in the pickle.
  3. Add sesame oil as mentioned.

Wednesday, February 6, 2013

ROASTED BELL PEPPERS SOUP RECIPE

Roasted bell pepper soup is the first time i am trying at home. At my place everyone loves soup and it takes place in the dinner menu almost twice a week. So for a change from the usual soups which i make, i tried this Red bell pepper Soup and it turned out very well. When i made it again the second time last weekend, i clicked the pictures and sharing the recipe of roasted bell pepper :

Bell pepper soup 3

INGREDIENTS:

RED BELL PEPPER 1
TOMATO 2
GARLIC 4 CLOVES
ONION 1
OREGANO 1/2 TSP
SALT TO TASTE
PEPPER TO TASTE
OLIVE OIL 2 TSP

Bell pepper soup 2

METHOD:

  • Wash the red bell pepper and pat dry this. Roast this on the stove top by turning it often. Take care not to burn your fingers. Once evenly roasted keep it aside. With the help of a knife scrap down the skin and if you want wash the bell pepper and chop them roughly.
capsicum step 1 capsicum step 2
  • Chop the onions ,garlic and tomatoes finely. In a pan, add oil ( i used olive oil, but if you don’t have cooking oil can be used) and add the garlic,onion,tomato one by one.
  • Roast them in a medium flame nicely. Once done , allow this to cool.
  • Grind this along with the chopped roasted bell pepper.
Capsicum soup step 4 Capsicum soup 6
  • In the same pan, add this puree and add 1 and 1/2 to 2 cups of water.
  • Bring it to a nice boil and add salt, pepper and oregano.
Capsicum soup 7 capsicum soup
  • Serve hot with soup sticks or even a simple bread toast.
  • The roasted flavour of the bell pepper in the soup makes it to taste great.
  • You can add 2-3 tblsp ofcooked pasta to this to make it more filling.

       Bell pepper soup 1 

Monday, February 4, 2013

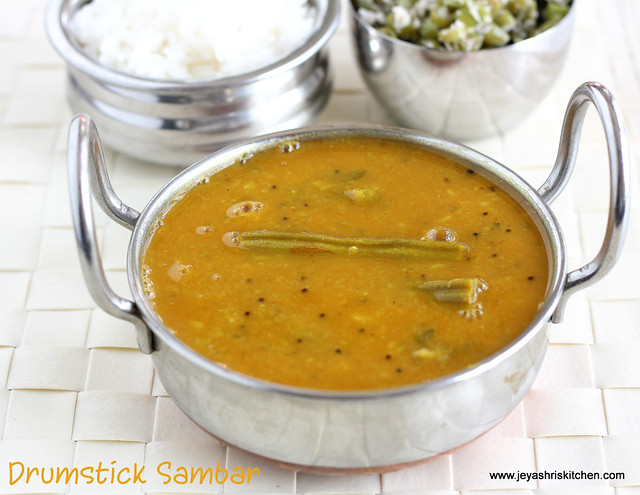
DRUMSTICK SAMBAR | MURUNGAIKKAI SAMBAR RECIPE

South Indian style Drumstick sambar| Murungakkai Samabr recipe with step by step pictures   
 Sambar is a usual one which we make almost twice a week and the veggies which we add varies according to the availability and the preference of the family members. The most popular one among my family is Drumstick sambar called as Murungaikkai Sambar in Tamil. Apart from that we make sambar with Shallots( small onion sambar ), radish(mullangi sambar) capsicum (one of my fav) and rarely with potatoes and brinjal.
  When i posted the Sambar  Powder recipe i thought i will post the recipe of Sambar with home made sambar powder. Here is my version of Drumstick sambar recipe.
Drumstick sambar 2
INGREDIENTS: (SERVES 3-4 ) Duration : 40 minutes
DRUMSTICK 2
TAMARIND EXTRACT 1 AND 1/2 CUP
SAMBAR POWDER 2 AND 1/2 TSP
TOOR DAL 3/4 CUP
SALT TO TASTE
TURMERIC POWDER 1/4 TSP
OIL 1 TSP
MUSTARD SEEDS 1/4 TSP
RED CHILLI 1 (OPTIONAL)
ASAFOETIDA A PINCH
CURRY LEAVES FEW
drumstick sambar 3
METHOD:
  • Soak a small lemon sized tamarind in hot water for 10 minutes and extract  the  juice by adding 1 and 1/2 cup of water.
  • Cook the toor dal with a pinch of turmeric powder for 4-5 whistles in a pressure cooker by adding necessary water.
  • Cut the drumstick into even small sizes.
Sambar step 2Sambar step 1

  • In a pan, add oil and throw in the mustard seeds and the red chilli.
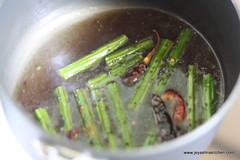
  • Add the cut drumstick and saute for a minute, and add the tamarind extract.
  • Now add the sambar powder, salt, turmeric powder and asafoetida.
  • Allow this to boil and let the drumstick to cook. Keep the flame to medium.

Sambar step 3Sambar step 6
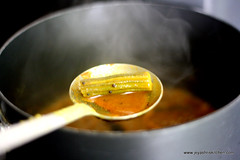
  • After few minutes check whether the drumstick has cooked and if done add thetoor dal. Mash it with the back of the ladle before you add. If the consistency is too thick add water to get the right consistency.
Sambar step 5Sambar step 7
  • Add curry leaves and bring this to a nice boil. My mom will add finely chopped coriander leaves too.
  • Serve hot with rice or even for Idli | Dosa too.
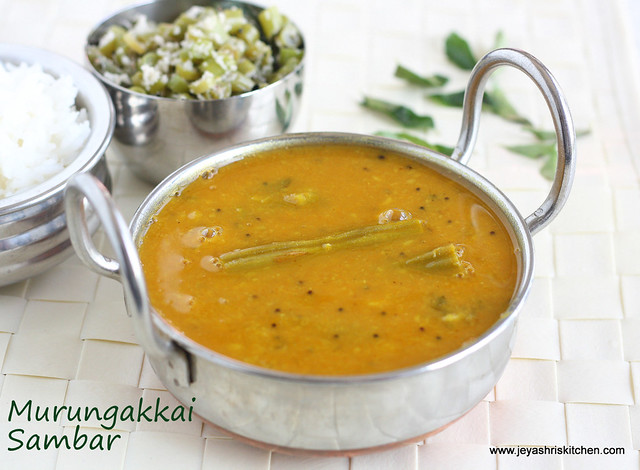
  • We had  drumstick sambar with Beans curry and rice.
        Drumstick Sambar 1
Check out my Arachuvitta Vengaya Sambar recipe too
Note:
  • We won’t add shallots in all sambar . If you want to add you can add after the mustard splutters.
  • If the sambar is too thin you can mix 1-2 tsp of rice flour in water without any lumps and add in the last and give a nice boil. Don’t add too much of rice flour as it will spoil the taste of the sambar.
     

Sunday, February 3, 2013

SAMBAR POWDER RECIPE | HOME MADE SAMBAR POWDER | SAMBAR PODI RECIPE

  Sambar powder|Sambar podi  is generally made at our place in bulk by drying it under sun and grinding it in the mills where they grind the ingredients of sambar powder into a fine powder.
When i posted the recipe of Rasam  Powder , i got many mails to post the recipe for sambar powder. I use sambar powder in most of my recipes and i love the one which my mom makes in bulk and pack for me during our visit to India. She is very particular to use the best quality of the ingredients as it will give a nice flavor to the sambar.
For all those who asked for Sambar powder in Small quantity, please check this Home made sambar masala post
Sambar Powder 1
INGREDIENTS:
RED CHILLI (USE LONG VARIETY) 1/2 KG
CORIANDER SEEDS(DHANIYA) 3/4 KG
TOOR DAL 100 GMS
BLACK PEPPER 50 GMS
METHI SEEDS(VENDAYAM) 1 TBLSP
TURMERIC * 7-8
*We use the long variety turmeric for this(Varali majal).
Sambar powder 2
  • Dry all the ingredients separately in a wide plate or on a newspaper in hot sun for 6-7 hours.
  • If you didn’t get proper sun during rainy days, u can microwave the ingredients for few minutes without changing the color of the ingredients.
  • Give it to a mill (rice mill) and make it into a fine powder.
  • Once done , spread the Sambar powder in a wide plate in shade (inside the house) for 10 minutes and store them in a dry, clean container. Always handle this with a dry spoon.
  • You can keep this in the refrigerator for longer use.
Sambar powder 3
This is the usual procedure in which we make sambar method at our place.

Friday, February 1, 2013

PULIYODARAI RECIPE ( IYENGAR TEMPLE STYLE)| SOUTH INDIAN RICE RECIPES

Puliyodarai 1
After Lord balaji, only pulliyodarai comes in mind whenever i think about Perumal  Kovil. The Puliyodarai served in Perumal Kovil in the dhonnais , will taste divine and nothing can beat the taste.
Though i have posted the recipe of Pulikaichal which my mom makes, i have been wanting to post this Iyengar style puliyodarai for a long time. This recipe i learnt from my friend who is an iyengar and i always feast on the puliyodarai which she makes.  So here is the recipe for authentic iyengar style temple puliyodarai.
Recipe updated with Video