Monday, October 31, 2011

PUMPKIN SOUP RECIPE- HALLOWEEN SPECIAL

  The weather here is totally changed and almost throughout the day it is raining and I am down with cough and cold for two days and didn’t go anywhere out. When my kids and husband went for vegetable shopping to the near by shop, my daughter picked up a piece of pumpkin and wanted to make something on halloween day , today. First i thought of making Muffins,but when i opened my fridge, i noticed that the butter was over. So i opted for pumpkin soup as it will  be comforting for my throat.
Pumpkin soup
INGREDIENTS:
PUMPKINS(CHOPPED) 2 CUPS
ONION 1 NO
GARLIC 4-5 NO
SALT AS NEEDED
PEPPER POWDER 1/2 TSP
OLIVE OIL 1TSP
LOW FAT MILK 1/2 CUP
pumpkin soup
METHOD:
  • Peel the skin of the pumpkin and chop it roughly.
chop
  • Chop the onions into cubes and peel the skin of the garlic.
  • In a pan, add oil and put the garlic and onions to this and saute for 2 mins in a medium flame.
onion and garlic
  • Then add the roughly chopped pumpkins and saute for another 2 minutes.
  • Now add 1 and 1/2 cup of water and cook the onion and pumpkin till the pumpkin become tender. Check it with a fork, whether they are cooked or not.
IMG_7776 IMG_7777
  • The pumpkin gets cooked in 7-8 mins.
  • Allow this to cool. Keep the extra water aside and grind the cooked pumpkin mixture into a puree.
  • Now add the water which we kept aside and the milk to this.
IMG_7779 IMG_7781
  • Boil this and add salt and pepper and enjoy a nice bowl of hot soup.
pumpkin-soup
Note:
  1. You can add a tsp of Oats to this while cooking the pumpkin.
  2. Finely chopped roasted onions can be added on the top for garnishing.

Friday, October 28, 2011

BEETROOT CHUTNEY RECIPE

Andhra style beetroot pachadi | chutney recipe       

Hope you all had a great diwali . After having continuous treat of sweets and snacks we all wanted to have a simple food. This beetroot chutney|thogaiyal is an yummy one which i learnt from a friend and when mixed with hot rice this will taste heaven.
Also check out my

beet root chutney
INGREDIENTS:
BEETROOT 1 NO
CUMIN SEEDS 1/2 TSP
CHANNA DAL 1 TSP
URAD DAL 1 TSP
REDCHILLI 3 NO
CURRY LEAVES A HANDFUL
GARLIC 2-3 NO
OIL 2TSP
MUSTARD SEEDS 1/4 TSP

BEETROOT CHUTNEY
METHOD:

  • Peel the skin of the beetroot and chop this into small cubes.
  • In a pan, add oil and throw in the cumin seeds, redchilli,garlic, curry leaves, channa dal and urad dal.
  • Saute this in a low flame till the dals turn golden brown.
  • Keep this aside.
IMG_5204
  • Now add the chopped beetroot and saute this in a medium flame without getting burnt. Add a Tsp of oil in between.
  • Cook for 10 mins.
IMG_5212
  • Allow it to cool. Grind this along with the dal mixture into a fine paste.
IMG_5215
  • In a pan add a drop of oil and the throw in the mustard seeds.
  • When it splutters, add the ground beetroot chutney.
  • Saute in a low flame for a minute.
  • Transfer it to a serving bowl.
  • Enjoy with rice,roti or even for dosa.
beetroot chutney

Monday, October 24, 2011

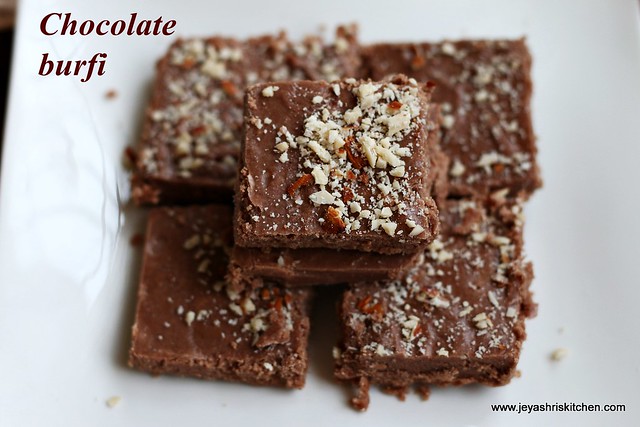
CHOCOLATE BURFI | CHOCOLATE FUDGE |DIWALI SWEET RECIPE

Chocolate-burfi 
Chocolate Burfi or Chocolate fudge is a simple and easy to make sweet and trust me this will really be a treat for kids . I learnt this from my husband’s mami , and i am sending this to my kids who have diwali celebrations at school tomorrow. Try out this simple diwali sweet recipe.
Check out my


Sunday, October 23, 2011

RICE PAYASAM FROM KAILAS KITCHEN – REMEMBERING JAYASREE SATISH

  I am really struggling to find words to write this post and can’t control tears rolling down from my eyes while writing this post. As a food blogger, we all will feel happy when someone tries our recipe and tell us they enjoyed the recipe very much. But Jayasree Satish is no more with us in this moment to enjoy the happy moments. Though i know only through facebook, i always love her smile and calmness in her face. To be more honest, i visited her blog for the first time a few days back and i am amazed to see very nice collection of recipes in her blog.
I tried rice payasam from her blog and that came out super delicious and my husband was asking me to make this again. When i told him about the source of recipe even he also felt very sad. Visit Kailas kitchen for the original recipe:
IMG_6741
INGREDIENTS:
RICE 3 TBLSP
COCONUT 1/2 CUP
MILK 1 CUP
GHEE 1 TSP
SUGAR 4 TBLSP
CARDAMOM POWDER A PINCH
CASHEW NUT 6-7 NO
  METHOD:
  • Soak the rice in water for 1/2 an hour.
  • Drain the water and grind this along with coconut into a fine paste.
  • In a pan, add 2 cups of water and the paste and cook it in a low flame stirring every now and then.
  • when this gets completely cooked (will be ready in 5-6 mins) add the sugar and stir well till it get dissolved.
  • Add milk to this and bring it to a boil keeping the flame low.Switch off the flame.
  • Fry the cashew nuts in ghee and add to the kheer.
  • Add cardamom powder to this. Mix well.
  • This really tasted well and since i am a big fan of coconut burfi i personally relished it to the core.
  • I made this on friday night as a dessert for dinner.
rice payasam

Friday, October 21, 2011

SANDESH RECIPE | DIWALI SWEET RECIPES

   Sandesh is  an easy sweet made with home made paneer. Long time i was planning to make this sandesh and I followed the method from here.
Check out my

sandesh
INGREDIENTS:
MILK 1 LITRE
LEMON JUICE 2 TBLSP
SUGAR 1/4 CUP
MILK MASALA A PINCH(OPTIONAL)
CARDAMOM POWDER A PINCH
PISTACHIO FEW (FOR GARNISHING)
sandesh
METHOD:

  • Bring the milk to boil and once it is done simmer the flame and add the lemon juice.
  • while adding the lemon juice dilute this with 1-2 tblsp of water.
  • When the milk starts curdling and the water separates switch off the flame and immediately strain this in a muslin cloth and wash it nicely to get rid of the sour taste of lemon.
IMG_6540 IMG_6542
  • Squeeze out the excess water. Now the fresh paneer is formed.
  • Making it into a smooth dough by nicely kneading with your hands for 4-5 mins.
  • Since in the original recipe it has given the option of doing this in a food processor, i put the paneer in the mixie along with sugar and milk masala powder. If using cardamom powder add at this stage.
  • Run the mixie for few seconds. This will become smooth and become a paste. This may be watery, do not panic.
IMG_6546 IMG_6548
  • Transfer this mixture to a pan and saute this nicely for 2 mins in a medium flame or till you reach the right consistency.
  • Switch off the flame.
IMG_6550 IMG_6551
  • Transfer this to a plate and knead well for a minute.
  • At this stage when you make a ball, it should be made without any cracks.IMG_6555
  • Go ahead of making equal sized balls and slightly flatten this.
  • Garnish with pistachios.
sandesh
This recipe yielded 8 sandesh. This can be stored in the fridge for  4-5 days.

Wednesday, October 19, 2011

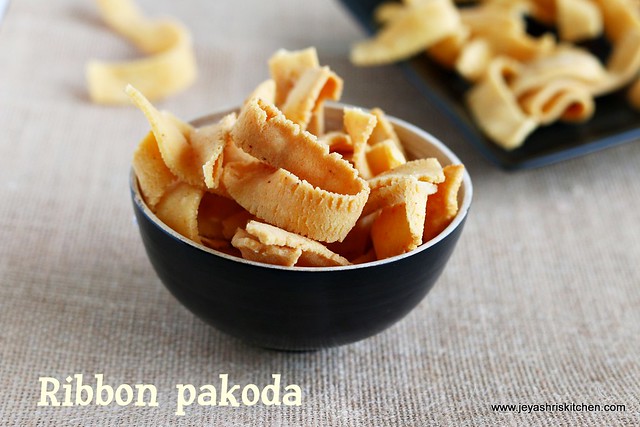
RIBBON PAKODA | NADA THENKUZHAL |DIWALI SNACK RECIPE

Recipe updated with Video  
Ribbon-pakoda
 Ribbon Pakoda| nada thenkuzhal|ola pakoda is an easy snack which is made during diwali | janmasthami in most of the houses. My mom and mil makes this very often as we all love this in our family. I am sharing the recipe for ribbon pakoda – an easy  snack recipe.I have posted another version of ribbon pakoda too.  Check out my full collection of Diwali recipes

Monday, October 17, 2011

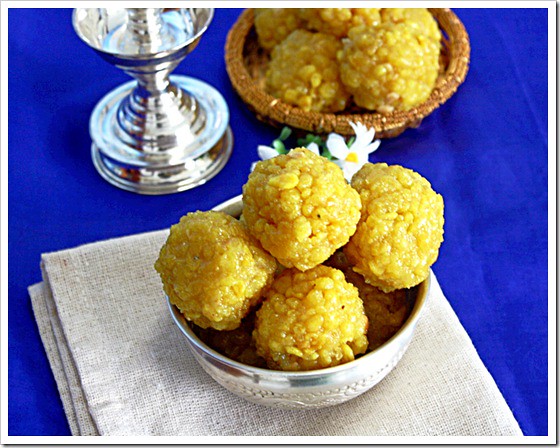
BOONDI LADOO| HOW TO MAKE BOONDI LADOO|DIWALI SWEET RECIPE | LADOO RECIPE WITH VIDEO

 Boondi Ladoo, a traditional popular Indian sweet made during festivals and  weddings, sweetballs made by mixing deep-fried gram flour batter with sugar syrup.  It is so
called because the batter is poured through a sieve or a perforated ladle, giving rise to tiny
roundels called boondi (derived from the Hindi word boond- tiny drops of water). I never
tried making Boondi Ladoo on my own after coming to Singapore, as I did not have the
boondi ladle (jarini in Tamil) with me. Much to my relief, my mother told me once that we
can use the normal perforated ladle, that we normally use for deep frying snacks. I was
overjoyed and decided to try making the laddus. Much to my delight, my attempt was a
great success. So friends, please erase all misconceptions about boondi ladoos being a
very complicated dish. I have updated the recipe with a video – How to make Ladoo and
shaping ladoos. For this festive season, also try my Motichoor ladoo and Khoya ladoo
recipe
Scroll down to watch an Updated Video on How to make Ladoo and shaping ladoos 


Boondi ladoo
  My mom’s sister shared the recipe with me and i have followed few tips from vah chef and mallika badrinath cookbook.
PREPARATION TIME : 15 MINUTES COOKING TIME: 30 MINUTES MAKES:12- 15 LADOOS

INGREDIENTS:
BESAN | BENGAL GRAM FLOUR 1 AND 1/4 CUP
COOKING SODA(BI CARBONATE OF SODA) A PINCH
SUGAR 1 AND 1/2 CUP
WATER(TO MAKE SUGAR SYRUP) 1/2 CUPminus1 TBLSP
OIL FOR DEEP FRYING THE BOONDI
FINELY CHOPPED CASHEW NUTS 1 TBLSP
CLOVES 3-4
CARDAMOM POWDER A PINCH
GHEE 1 TSP
YELLOW FOOD COLOUR A PINCH(OPTIONAL)

Boondi ladoo


Check out this Video of Making and shaping ladoo below


METHOD:
  • Sieve the besan without any lumps. Add the cooking soda to this.Add the yellow food colour (if using). I didn’t use as my besan always gives a nice yellow colour.
  • Mix the besan with water to make a batter of dosa batter consistency.
IMG_6104 IMG_6118
  • While adding water to the besan , first add a small amount of water and make it into a thick paste.
  • Then add the rest of the water. the amount of water for 1 and 1/4 cup of besan is approximately 3/4 cup of water. This purely depends upon the texture of the besan.
  • Fry the cashew nuts and cloves in a tsp of ghee and keep it aside.
IMG_6114 IMG_6106
  • For making the sugar syrup, mix the sugar with the given amount of water  in a heavy bottomed vessel.
  • Heat till the sugar gets dissolved stirring in between.
  • Once sugar gets dissolved stop stirring and boil till this reach one string consistency.
  • You can check the one thread  consistency of the syrup between the thumb and the index finger.
IMG_6105 IMG_6111
  • Switch off the flame at this stage and heat the oil in a heavy bottomed pan to fry boondis.
  • To check whether the  consistency is right for the batter, take a spoon and with the back of the spoon mix the batter well and just hold it on the top of the hot oil.
  • If this forms a nice round ball then the consistency if perfect, else it gives a tail you need to add little extra water. Add 1 tblsp and check again.
  • If this forms a very thin roundels then the water is more, just add one tblsp of besan to this and check again.
  • Now the batter is ready for boondis.
IMG_6115
  • You need 2 perforated ladle for making this. The ladle with small holes to make boondi and another one to take out the boondis from oil.
  • Pour a ladle of batter to the perforated ladle ,keeping the ladle on the top of the oil and  let the boondis falls into the oil.
  • When it is half fried take it out from the oil and trasfer it to the sugar syrup.
IMG_6122-1 IMG_6125
  • Repeat the process for the the remaining batter.
  • While repeating , wipe out the excess batter from the top and back of the ladle used for making boondi. This will help in getting round shape.
  • I remember my grand mom washes the ladle for each batch and wipe with a dry cloth.
IMG_6120
  • Add the fried cahew nuts, cloves and elachi powder to the boondi sugar mixture.
  • Mix this well with the back side of the ladle.
IMG_6128
  • When it is luke warm make balls of desired shapes and store this in a airtight container.
IMG_6130


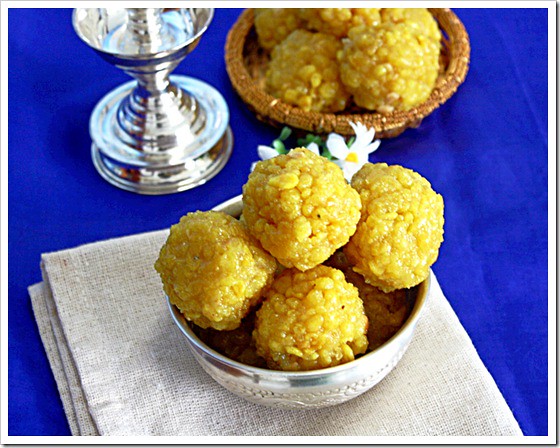
boondi ladoo
Note:
  • The sugar syrup should be warm while putting the boondis in that.
  • Make balls when this is luke warm, else the sugar will be crystalised and ladoos can not be formed.
  • The ladoo ,if handled properly can be stored for 7 days in the room temperature.
  • Always use good quality sugar and mineral water| drinking water for making the syrup.
  • Do not touch ladoos with wet hands.
  • Do not use water ,if you don’t get balls.this will make a fungal layer on the ladoo.
  • If for any reason you dont able to make balls, just make 2 tbslp of sugar syrup of pur this over the boondis and make ladoos.

Friday, October 14, 2011

KALAKAND RECIPE|DIWALI SWEETS RECIPE

  Kalakand is a milk sweet which i tried for the first time and i was very much impressed by the outcome of this sweet. Though i have tasted this few years ago,this is the first time i attempted to try this and it was a great hit. You can try this for Janmashtami neivedyam too.
Check out

Kalakand recipe   
INGREDIENTS:
MILK 2 CUPS + 2 CUPS
LEMON JUICE 1 AND 1/2 TBLSP
SUGAR 1/4 CUP +3 TBLSP
CARDAMOM POWDER A PINCH
GHEE 1/4 TSP(TO GREASE THE PLATE
PISTACHIO FEW TO GARNISH

This measurement yielded 7-8 kalakands of medium size.
kalakand
Method:

  • Add 2 cups of milk in a vessel and once this reaches the boiling consistency just keep the flame in low and allow the milk to reduce into 1to 1 and 1/4 cup.
IMG_5804
  • Meanwhile boil the remaining 2 cups of milk in a vessel and once when it comes to boil, add the lemon juice to this. Dilute the lemon juice with 1 tsp of water.
IMG_5806 IMG_5807
  • Now you can see the water start separating.
  • switch off the flame to avoid over coking and drain with a clean muslin cloth.
  • Wash this nicely in running tap water. This step is to get rid of the sour taste of the lemon in the paneer.
IMG_5808 paneer
  • Add this Paneer to the boiling milk and mix well.
  • Keep the flame low.
  • Add sugar and cardamom powder  to this and mix well.
IMG_5814 IMG_5815
  • Saute this nicely without getting burnt, till the moisture leaves and this become a whole mass.
  • This took approximately 11 minutes for me.
  • Grease a plate with ghee and keep aside.
  • Once the milk + paneer combo comes into a mass transfer this to the plate greased with ghee.
IMG_5817 IMG_5818
  • Keep this in the refrigerator for half an hour.
  • After that, cut them into squares and garnish with sliced pistachios.
kalakand
Note:
  1. You can replace sugar with 1/2 tin of condensed milk.
  2. If using condensed milk add it after the milk comes to a boil.
  3. This can be done in microwave also .

Wednesday, October 12, 2011

OKKARAI |UKKARAI RECIPE-DIWALI SWEET RECIPE

Okkarai recipe with Video - Updated

Okkarai | Ukkarai is a traditional sweet made in  most of the tamil brahmin houses for diwali. I still remember my mom makes this in a very bulk quantity and except me everybody loves this okkarai very much. When i was talking to my mom yesterday, suddenly i remembered of this and asked her for the recipe. In my in –laws place we don’t make this ,and i made this for my hubby who is very fond of sweets. Here comes the recipe of okkarai. Check out my complete collection of Diwali recipes.
Okkarai-recipe