Wednesday, April 25, 2012

LEMON PICKLE RECIPE | PICKLE RECIPES

       This is the first time i tried lemon pickle at home, though my mom is an expert in making different types of lemon pickles ,since my dad is a huge fan of lemon pickle. As  i am not a big fan of this lemon pickle i never tried on my own. I always make pickles with mangoes but after coming to Singapore i never made anything . When a reader asked me to post this lemon pickle i asked my mom for the recipe and the entire process of making lemon pickle took a month and now on to the recipe of lemon pickle . 
LEMON PICKLE   
INGREDIENTS:
LEMON( I used Indian lemon) 6 NO
RED CHILI 8-9 NO
TURMERIC POWDER 1/2 TSP
VENDAYAM(FENUGREEK SEEDS) 1/2 TBLSP
SESAME OIL 1/4 CUP + 3 TBLSP
MUSTARD SEEDS 1/2 TSP
SALT 1/2 TBLSP+ 2 TSP
ASAFOETIDA 1/2 TSP
PICKLE
METHOD:
  • Wash the lemons and pat dry them nicely in a kitchen towel.
  • Ensure that there should not be any moisture.
IMG_9859
  • Wash and clean a glass bottle and nicely dry this without even a drop of water.
IMG_9856
  • Cut the lemon into two and slightly squeeze out the juice. Do this very gently, else the pickle will become bitter.
  • This step is lessen the sourness of the pickle.
  • Gently remove the seeds with the help of a knife.
IMG_9862 IMG_9863
  • Cut the lemon into small  size pieces.
IMG_9864
  • Immediately add salt and asafoetida and mix well.
  • In a pan dry roast the fenugreek seed till they become slightly brown.
  • Do not roast too much as this will make the pickle bitter.
IMG_9865
  • Dry roast the red chilies  in a pan.
IMG_9866
  • Grind the redchillis and fenugreek seeds together into a fine powder.
IMG_9867
  • Throw this onto the cut lemon and mix nicely using a dry spoon.
IMG_9868 IMG_9869
  • In a pan heat the oil and throw in the mustard seeds.
  • Add this to the pickle and add turmeric powder and mix well.
IMG_9871
  • Transfer this to the glass bottle and cover this with a thin muslin cloth and tie this with the help of a rubber band.
IMG_9873
  • Keep this in sunlight for 3 –4 weeks ( inside the home where you get bright sunlight)
  • Every day with the help of a dry spoon mix the pickle nicely and close it.
  • No need to keep in the refrigerator.
  • After 4 weeks the skin of the lemon  will be soft and the lemon must have absorbed the spices.
pickle
  • Now keep it in the fridge and enjoy with curd rice and love to have pickles with sambar rice too.
lemon pickle
Note:
  • In any step , ensure that there shouldn’t be any moisture and keep you hands always dry.
  • The containers you use should be dry and spoons too.
  • Always take care not to burn the vendayam and red chilis. This will make the pickle bitter.
  • sometimes my mom pressure cook the cut lemon pieces for a whistle but this will not have longer shelf life.
  • In this method, no need to keep it under the sunlight, just can be consumed immediately.
  • The oil will  be dried up , so after 4 weeks heat 2 tblsp of sesame oil and add to the pickle and mix well.

Sunday, April 22, 2012

GRAPE AND ORANGE JUICE RECIPE | SUMMER DRINK RECIPES

      Everywhere the summer is on the peak and here also the weather is very hot during the day and it is raining badly in the evenings!!. Black grapes is one among my favorite fruit and whenever there is season my mom used to buy almost everyday and and later we used to get seedless grapes which I remember the lady who regularly sell grapes to my place refers the seedless one as Hyderabad grapes.

After coming here, we used to get this seedless grapes in the supermarket nearby my house ,throughout the season. Few days back when i returned back home after a my usual weekly vegetable shopping, i was so thirsty and was craving for a juice and i had few grapes and 2 oranges left in the fruit basket and wanted to try a fruit punch with this. Trust me, this combo turned out very yummy and the ginger i added gave a wonderful flavor to this. Don’t skip the ginger.

grape juice 

INGREDIENTS:

BLACK GRAPES 1 CUP
ORANGE 2 NO
WATER 1/2 CUP
SUGAR 1 TBLSP
GINGER A VERY SMALL PIECE


GRAPE JUICE

  • Wash the grapes nicely and blend this in a blender along with sugar and ginger.
  • Take out the juice from the orange and add to this.

IMG_0350

  • Strain this using a strainer.

IMG_0351

  • Serve chilled or add few ice cubes and serve immediately.

juice

NOTE:

  • Adjust the sugar according to the sweetness of the fruits.
  • Both the grapes and orange i used were sweet.
  • Lemon juice can be replaced with orange juice.
  • Plain soda can be added if you want this slightly fizzy.

Friday, April 20, 2012

BHEL POORI WITHOUT CHUTNEY | PARTY SNACK IDEAS

     I have  been thinking to post a chat item for a long time  but somehow i couldn’t make both the chutneys at the same time. One day when i was having a a casual talk with my friend she was talking about this sukha bhel which she made in a jiffy and enjoyed the snack while watching her favorite movie. I loved this idea and made this according to my own taste and i served this on the top of plain crackers and kids loved this snack.This can be served as a starter on the top of any plain biscuits.

bhel puri

Before going to the ingredients, let me tell one thing. There is no hard and fast rules to follow the same proportion. Just go as per your taste.

   INGREDIENTS:

BOILED PEANUTS 1/4 CUP
PUFFED RICE(PORI) 1 CUP
OIL 1 TSP
ONION 1 NO
TOMATO 1 NO
RAW MANGO (CHOPPED) 1 TBLSP
CAPSICUM( CHOPPED) 1 TBLSP
RED CHILLI POWDER TO TASTE
SALT TO TASTE
CHAT MASALA 2 PINCHES
LEMON JUICE 1/2 TSP
CORIANDER LEAVES FEW
NYLON SEV 2-3 TBLSP
BHEL PORI

METHOD:

  • Soak the peanuts for half an hour and pressure cook for 2 whistles by adding salt..
  • Drain the excess water and allow this to cool completely.

peanuts

  • De seed the tomato and chop the onions and tomatoes finely.

chop

  • Roast the puffed rice(pori) in a tsp of oil along with a pinch of turmeric till they turn crispy and golden brown. Be careful not to burn this.

pori

  • In a wide bowl, just before serving mix everything along with red chili powder and chat masala. 
IMG_0245 IMG_0246
  • Check for salt.
  • Add coriander leaves and squeeze in the lemon juice.
  • Mix nicely.
  • Eat this crunchy. Always mix everything just before serving else this will be soggy.

sukha bhel

NOTE:

  1. Boiled and cubed potatoes can be added to this.
  2. I did not have nylon sev , so i added the store bought Aloo bhujia .
  3. Pomegranate can also be added.
  4. I served on this on plain crackers but even 50 50 biscuits can also be used or any salt biscuits can be used for serving.
  5. As chat masala contains salt just check for salt before adding salt.
  6. Roasted peanuts can be added instead of boiled peanuts.

Wednesday, April 18, 2012

EGGLESS MANGO CAKE RECIPE | VEGAN MANGO CAKE

     Few weeks back when i went to my grocery shopping the i picked the alphonsa mango pulp tin thinking that i will make the Mango ice cream again to surprise Varsha, my daughter. Since i made strawberry ice cream she told she wanted some cake from the mango pulp and when i  was searching  for a eggless mango cake in google  i came across this recipe in holy cow's space and this has been tried by many bloggers. Here is the recipe for soft and moist eggless mango cake.
mango cake
INGREDIENTS:
ALL PURPOSE FLOUR 1 AND 1/2 CUP
BAKING POWDER 2 TSP
SALT 1/2 TSP
CARDAMON POWDER 1 TSP
MANGO PUREE 1 AND 1/2 CUP
OIL 1/3 CUP
SUGAR 2/3 CUP( APPROX. 11 TBLSP)
VANILLA ESSENCE 1 TSP
mango cake
METHOD:
  • Sift the flour ,salt and baking powder along with cardamom powder.
IMG_9726
  • Mix the oil, sugar, mango puree till the sugar dissolves.
IMG_9727
  • Gently mix with the flour.

  • Transfer this to a a baking tin and bake in a 180 degrees preheated oven for 30 to 35 minutes or until a toothpick inserted in the center comes out clean.
  • Cool it in a wire rack.
IMG_9730 IMG_9732
  • We had warm cake with vanilla ice cream.
mango cake
Note:
  1. If using fresh mango peel the skin and chop the flesh of the mango into fine pieces and puree it in a blender.
  2. Do not over mix the batter.
  3. The cake turned out slightly dense .
  4. You can make it into cute cup cakes also instead of making into a cake.

Monday, April 16, 2012

BROCCOLI STIR FRY RECIPE

    Broccoli stir fry recipe is a simple and easy recipe which can be made in a jiffy and be packed in lunch box for kids. Even this can be had with rotis.

Broccoli stir fry

BROCCOLI 1 NO
CAPSICUM 1 NO
ONION 1 NO
GARLIC 3 PODS
PEPPER POWDER 1 TSP
SALT AS NEEDED
OLIVE OIL 1 – 2 TSP
PEANUTS 1 TBLSP(OPTIONAL)

broccoli stir fry

  • Cut the broccoli into florets.
  • Chop the onions and garlic finely.
  • Cut the capsicum the into cubes.
  • Microwave the broccoli florets for 7-10 minutes.
  • In a pan, add oil and finely chopped garlic and after 30 seconds, add the chopped onions.
IMG_9928 IMG_9933-001

  • When it turns pink add the cubed capsicums.
  • When it is crunchy add the microwaved broccoli florets.
  • Add the salt and pepper and saute for 2 mins.
IMG_9935 IMG_9937-001

  • If you are adding peanuts just dry roast it and remove the skin and coarsely grind it and add to the stir fry.
  • Switch off the flame. Always serve hot .

broccoli stir fry

Note:

  • You can add a tblsp of roasted sesame seeds at the last.
  • You can add a tblsp of scrapped coconut at the last.
  • If you don’t have a microwave just parboil the broccoli florets.

Friday, April 13, 2012

CHAKKA PRADAMAN RECIPE | JACKFRUIT PAYASAM

   When i saw jackfruits in the wet market yesterday i picked up 2 packets of jackfruits keeping in mind making chakka pradaman today for Tamil New year today. But i don’t have any idea about the recipe and while i was having a casual talk with Raks  she also gave a idea and i vaguely remembered the way my mom makes jackfruit payasam. Finally today when i made this it turned out extremely nice and i am now waiting for everyone to come back from school and office to taste this jackfruit kheer.
payasam

JACK FRUIT 10- 15 PIECES
JAGGERY 1/2 CUP
COCONUT MILK(THICK) 1/2 CUP
CASHEW NUTS 5-7 NO
GHEE 1 TBLSP
payasam
METHOD:
  • Wash the jackfruit pieces and deseed them.
  • Cut them into pieces roughly.
IMG_0106
  • Slightly roast them in a tsp of ghee for 2 minutes in a medium flame.
IMG_0107
  • Pressure cook them for 2 whistles by adding a cup of water.
  • When done, allow it to cool and grind it into a smooth paste.
IMG_0110 IMG_0111
  • I got one and 1/4 cups of puree.
  • Melt the jaggery in 1/2 cup of water and filter the impurities.
  • Boil the jaggery water for 3 minutes in low flame.
IMG_0109
  • Add the jackfruit puree to this and boil for 2 minutes.
IMG_0112
  • Now add the coconut milk and just give a boil for 2 minutes in a low flame.
  • I used the store bought coconut milk.
IMG_0113
  • Do not boil for a long time after adding the coconut milk. Else it will curdle.
  • Roast the cashews in ghee and add to the payasam.
  • This taste great when it is served warm and chilled.
payasam
Note:
  • Coconut milk can be replaced with normal milk, but i recommend the addition of coconut milk.
  • If the consistency is too thick just add 1/2 cup of water after the addition of coconut milk.
  • I never add cardamom powder as i feel this will suppress the flavor of jackfruit.
  • Adjust the level of jaggery according to the sweetness of the jackfruit.

Wednesday, April 11, 2012

HOME MADE STRAWBERRY ICE CREAM RECIPE – NO EGG – NO ICECREAM MAKER.

   We all are a big fan of ice cream at home except my little one. When i attempted my first ice cream at home with MANGO it was a super hit. Few weeks later I attempted the same recipe with replacing strawberry with mango . This was again a super hit. After an year i tried ice cream at home and this time i gave a slight twist by adding evaporated milk. It was so creamy and no one can believe that it is home made.

I hurried up while taking pictures as the temperature was hot outside the ice cream started melting!!

ice cream

INGREDIENTS:

STRAWBERRY PUREE  (FROM 35-40 strawberries) 2 cups
CREAM 3/4 CUP
CONDENSED MILK 3/4 CUP
EVAPORATED MILK 1/4 CUP
SUGAR 3-4 TBLSP


ICE CREAM

  • Wash and hull the strawberries and make it into a puree with the help of a blender.
  • Reserve 3-4 strawberries to add in the last .
IMG_9683 IMG_9684
  • In a wide bowl, add the puree and add the condensed milk, cream, evaporated milk and sugar.
  • If you don’t get evaporated milk just replace with condensed milk.
  • Just adjust the sugar accordingly in that case.
  • Mix gently with a hand blender till everything incorporates well.
IMG_9686 IMG_9687

  • In a freezer safe bowl, pour in this mixture and freeze for an hour.

IMG_9688

  • After an hour, take it out and nicely blend in a mixer and freeze it again for an hour.
  • Repeat this procedure for 2 more times.
  • After doing this for 3 times, before freezing this, chop the reserved strawberries into tiny bits and mix well.
  • Deep freeze for 6-7 hours.
IMG_9691 IMG_9693

  • Strawberry ice cream is ready to serve.

icecream

Notes:

  • I used the nestle cream. Any type of cream can be used.
  • Sugar can be increased or decreased according to the sourness of the strawberry.
  • Do not skip the step of blending the mixture every one hour. This step will make smooth and soft ice cream .
  • As i mentioned already, if evaporated milk is not available, just replace with condensed milk. Just in that case, adjust the addition of sugar.

Check out my Mango Ice cream too.

Monday, April 9, 2012

ROOMALI ROTI | RUMALI ROTI RECIPE

   Making roomali roti at home was my long time plan and somehow i  kept on postponing it and suddenly one day i decided to make it and tried at home and it turned out pretty well. But still i felt it has be little soft and attempted on the next day, and it was much better than the first attempt. My hubby who loves roomali roti enjoyed this.

Friday, April 6, 2012

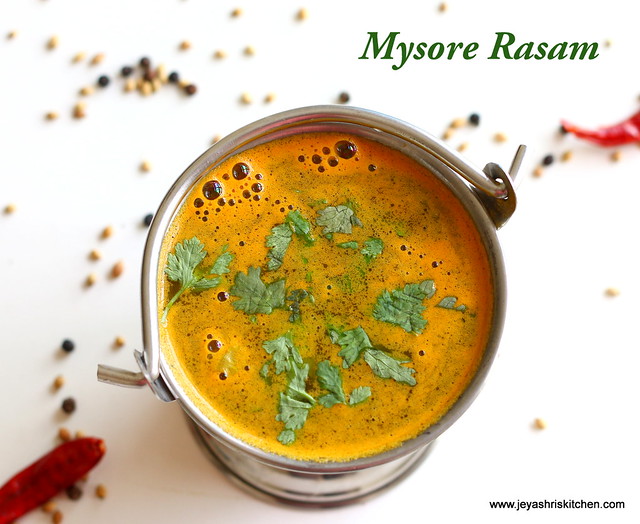
MYSORE RASAM RECIPE | ARACHUVITTA RASAM |RASAM RECIPES

   mysore- rasam
Mysore rasam- A flavourful rasam made with a unique blend of tomatoes and whole spices  comprising of peppercorns and grated coconut. Mysore Rasam or Arachuvitta rasam, is a flavourful rasam made by grinding the whole spices (as the name Arachivitta meaning after grinding in Tamil, implies). It is very popular in the Karnataka cuisine. It gets its aroma because of the freshly made masala that goes into it. It pairs well with hot rice and can also be had as an appetizer/soup. I got this recipe from my sister and we all thoroughly enjoyed it. Do check out my other interesting rasam
variations like kalyana rasam, pineapple rasam or my mor rasam recipe for a unique flavour.